A 12 Step Guide To Build Your Event Landing Page On Converve
Your event landing page is one of the first things your attendees get to see before the event. And we believe it’s an important tool for your audience to get a sneak peek at all the amazing things you’ve planned for them. Get them into the door – virtual or physical – by giving out important information so interested visitors can convert into event attendees.
Here’s a step-by-step guide to building your event landing page, and you’ll be well on your way to a successful event on Converve. In this article we’ve covered:
- How to build an event landing page with Converve’s page builder
- Best practices to sky-rocket registrations with an event landing page
- Event landing pages created with Converve
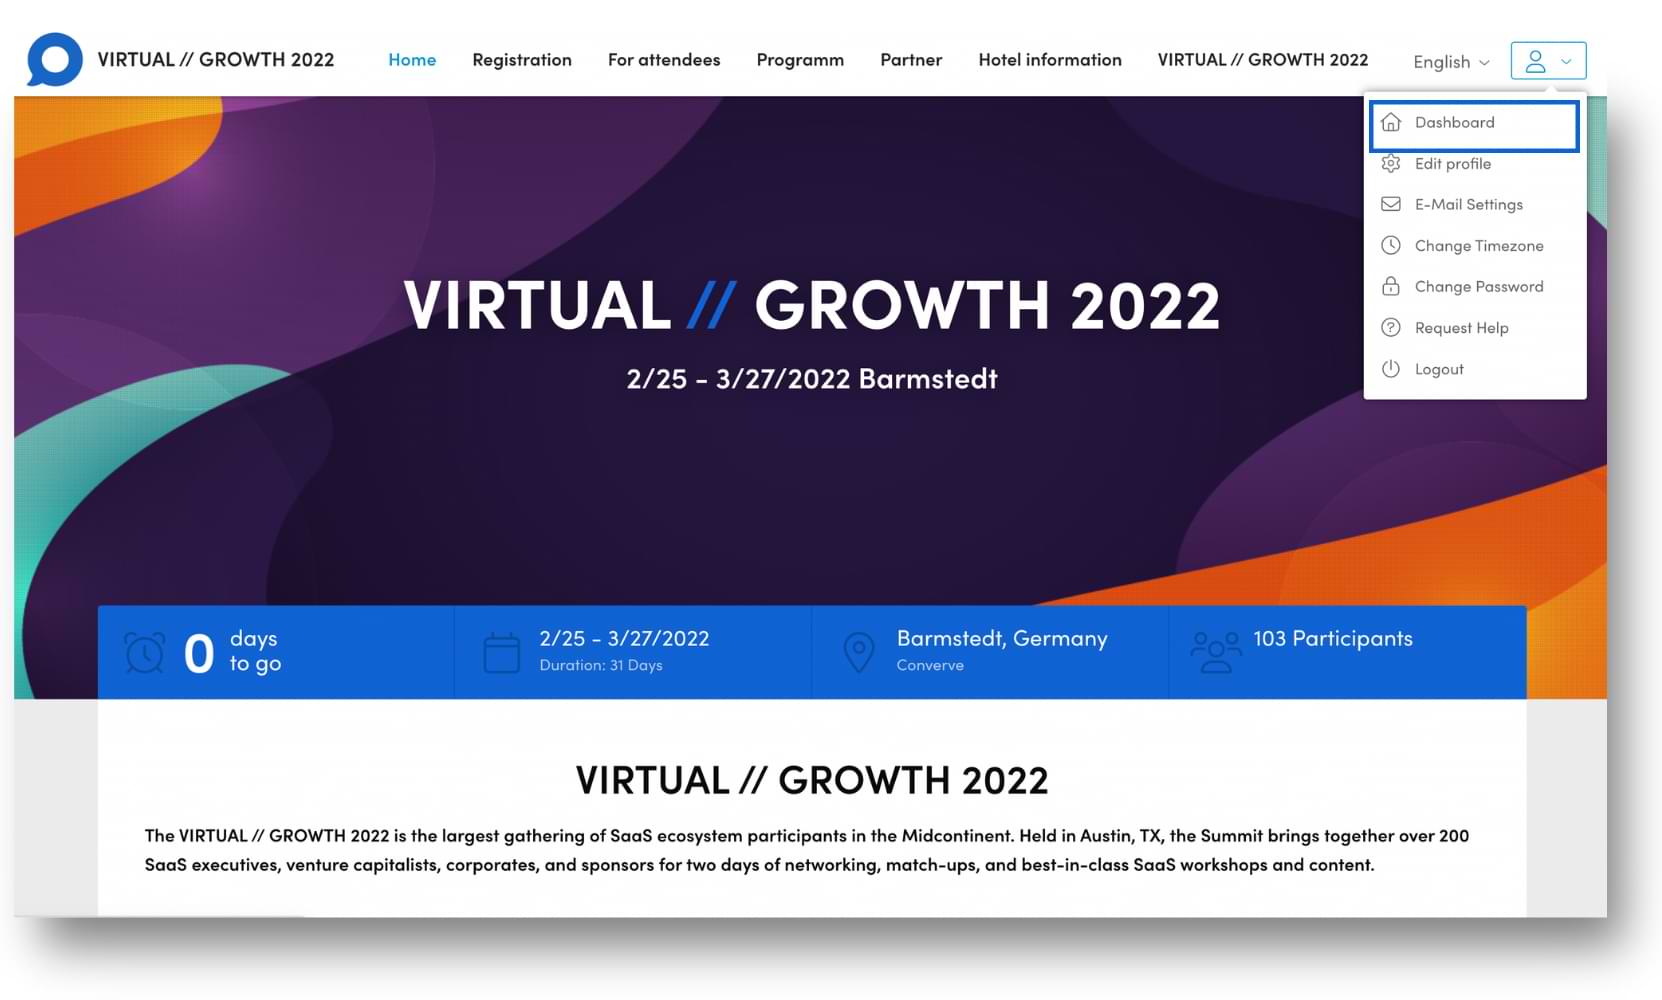
Step 1: Head to the dashboard
Log into your profile and click on the profile icon. Select the “Dashboard” option from the drop-down menu.
Step 2: Add event details
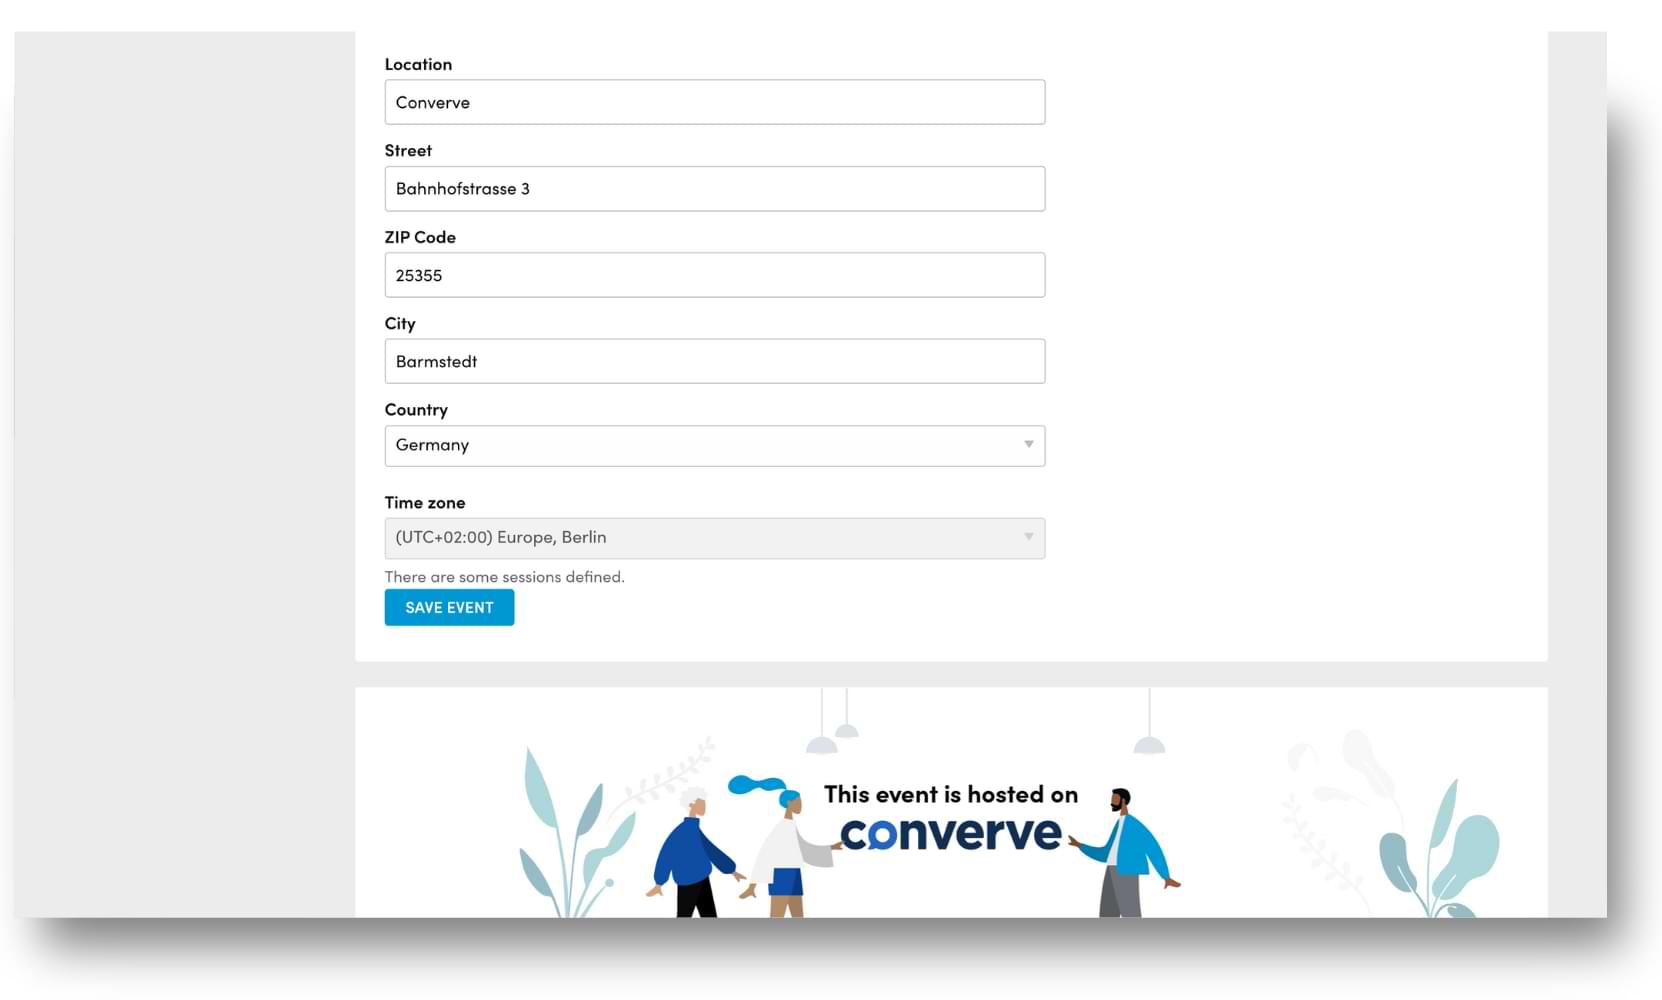
Click on the “Event Settings” option on the dashboard and select “Edit Event”. You can enter information like the event name, date, and location here.
These details appear automatically on your event landing page.
Fill in your event name and duration.
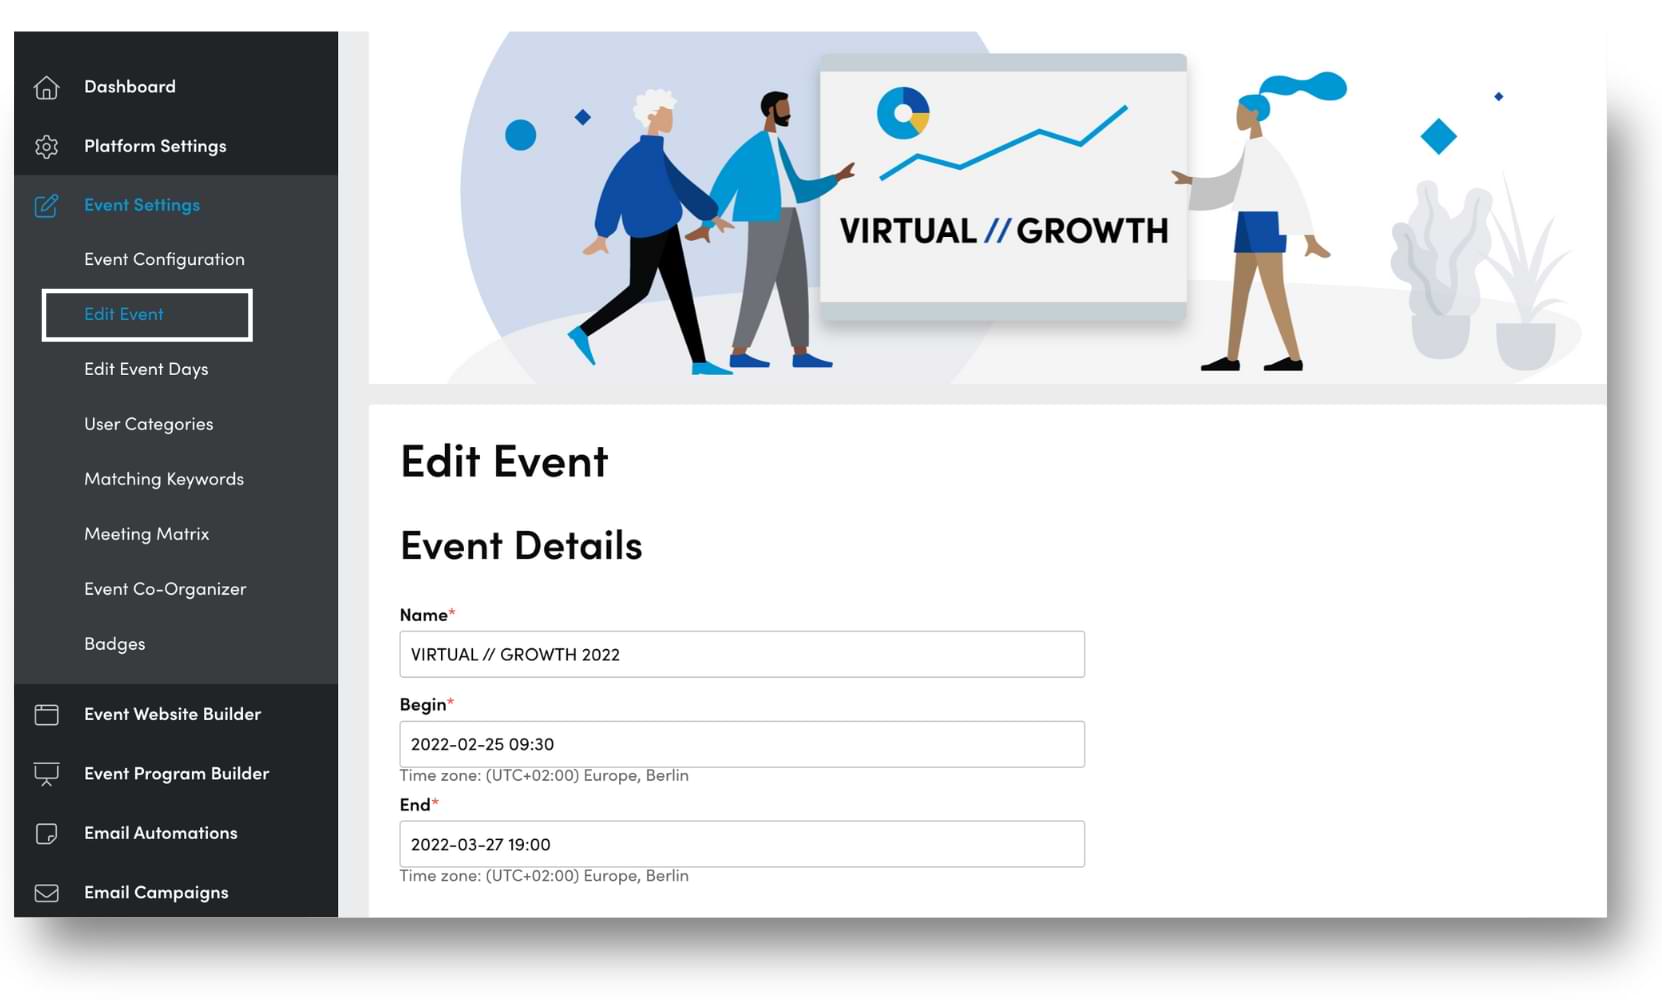
Enter the dates of your event.
Update the location and the time zone.
Click on the option “Event Website Builder” and select “Page Builder”.
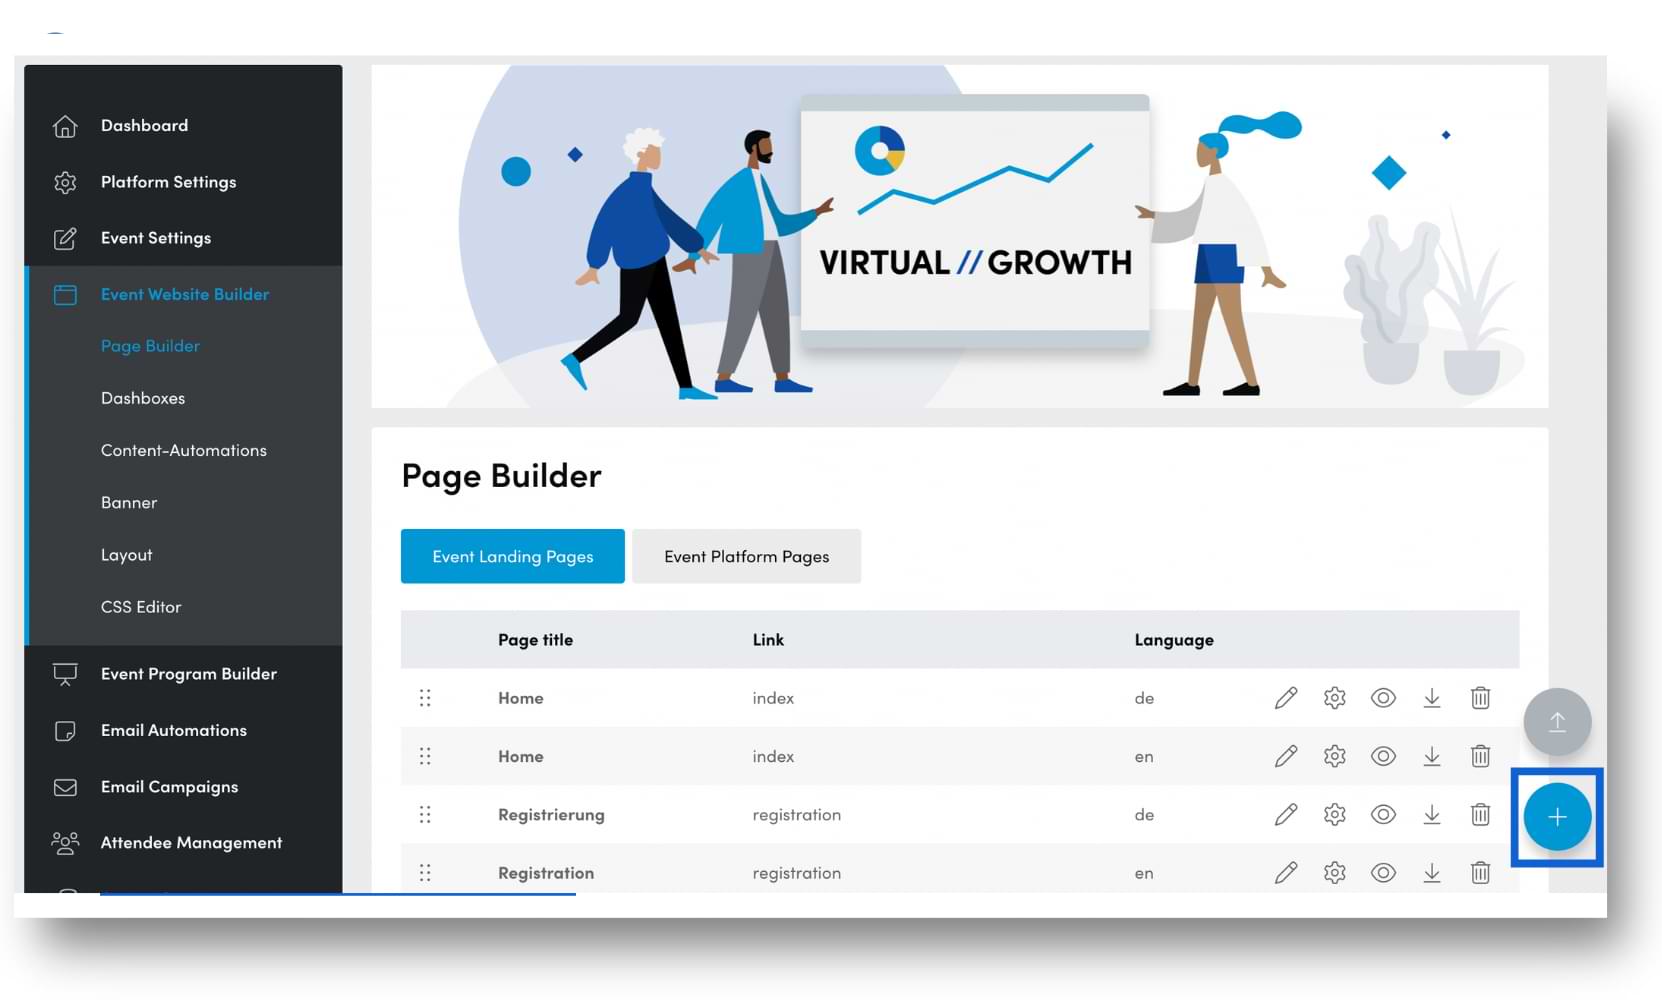
Step 4: Create an Event Landing page
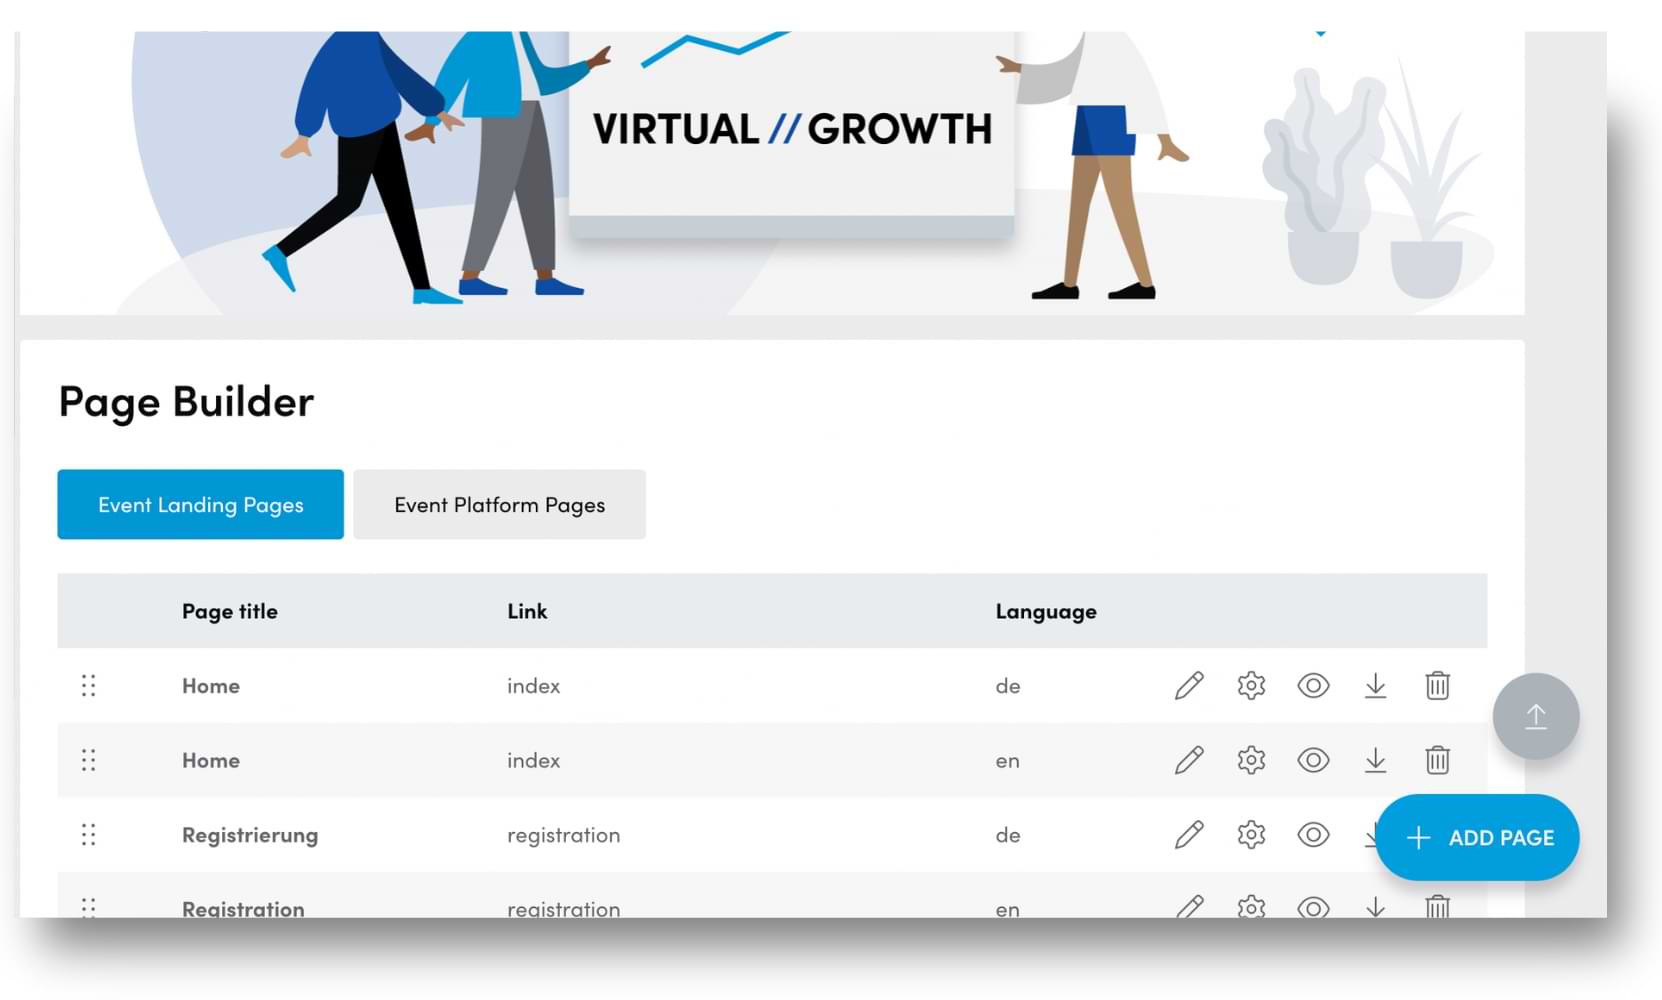
Hover on the “+” symbol at the bottom right of your page and click on “Add Page”.
Step 5: Select a template
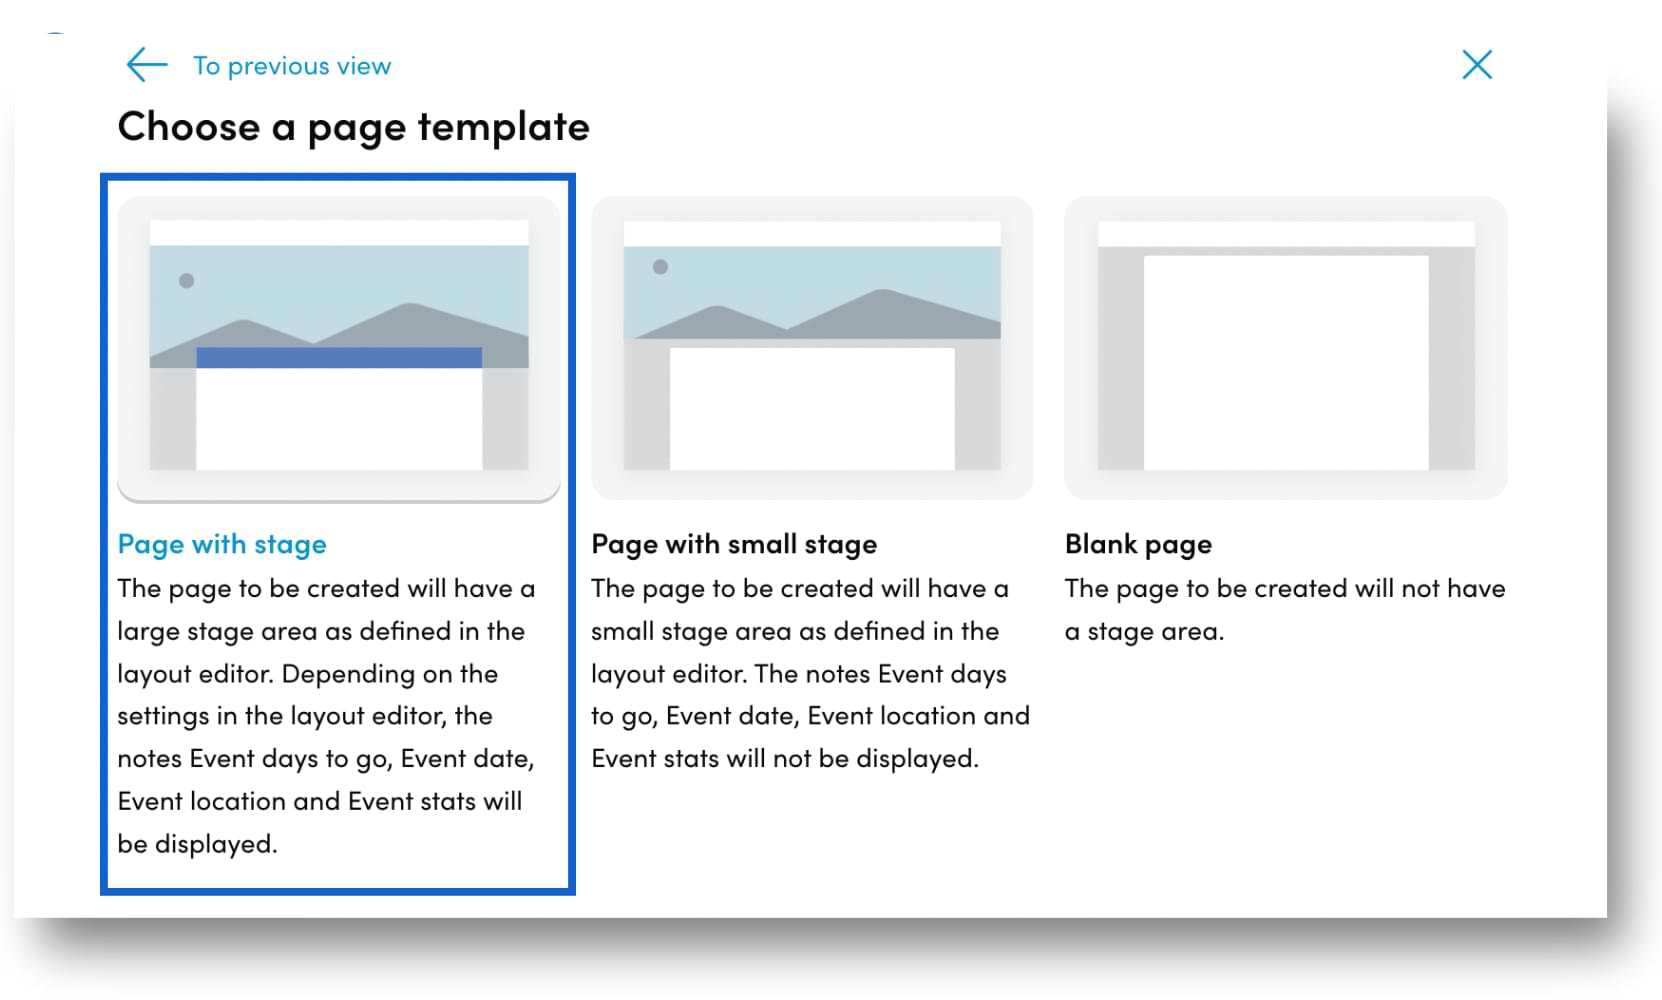
Depending on your event needs, select a template that would complement it.
The first option in the pop-up gives you a bigger page banner image. The second one has a relatively smaller banner. While the third option gives you a blank canvas to build your event page from scratch.
We have selected the first option for this sample event landing page. With this template, the metadata can be clearly seen at the top of the page. This makes it easy for your visitors to get your event’s information at a glance.
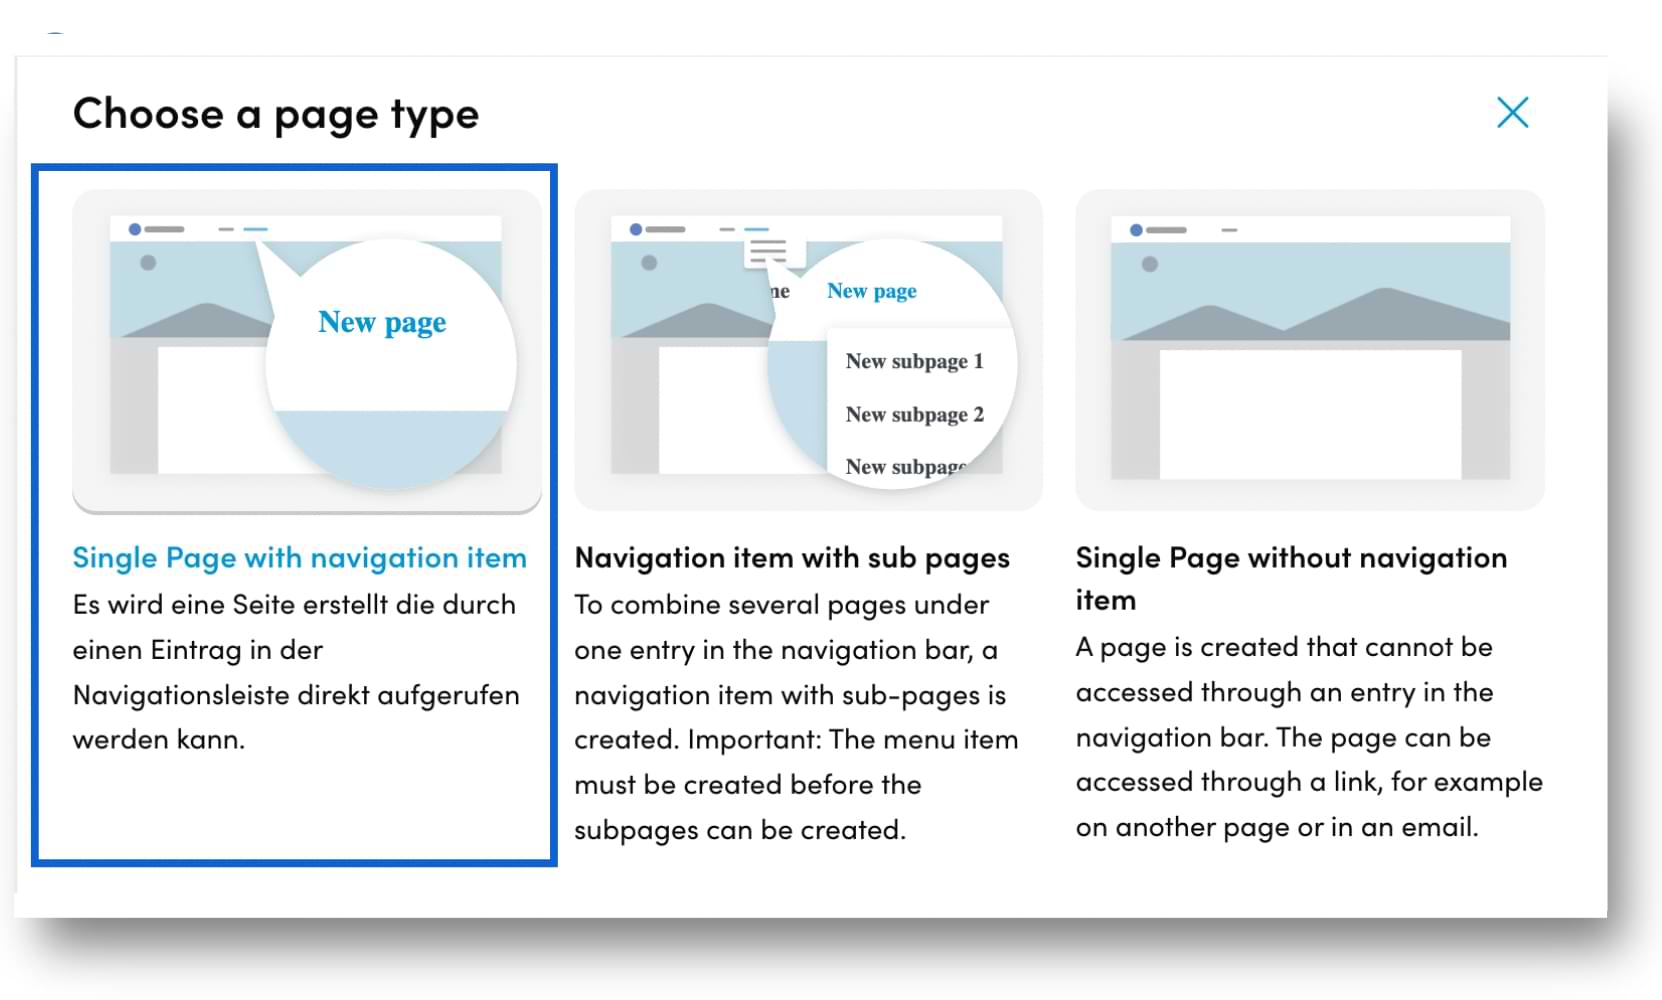
Next, customise your event landing page’s navigation menu. You can choose from having:
- A single-page website with no navigation. This option works best when want people to access the site from a link. For example, the link could be shared on social media or through email invites.
- A single page with a navigation menu. You may use this when
- An event website with sub-pages under the navigation menu. If you want to build sub
We have selected the first option for this example.
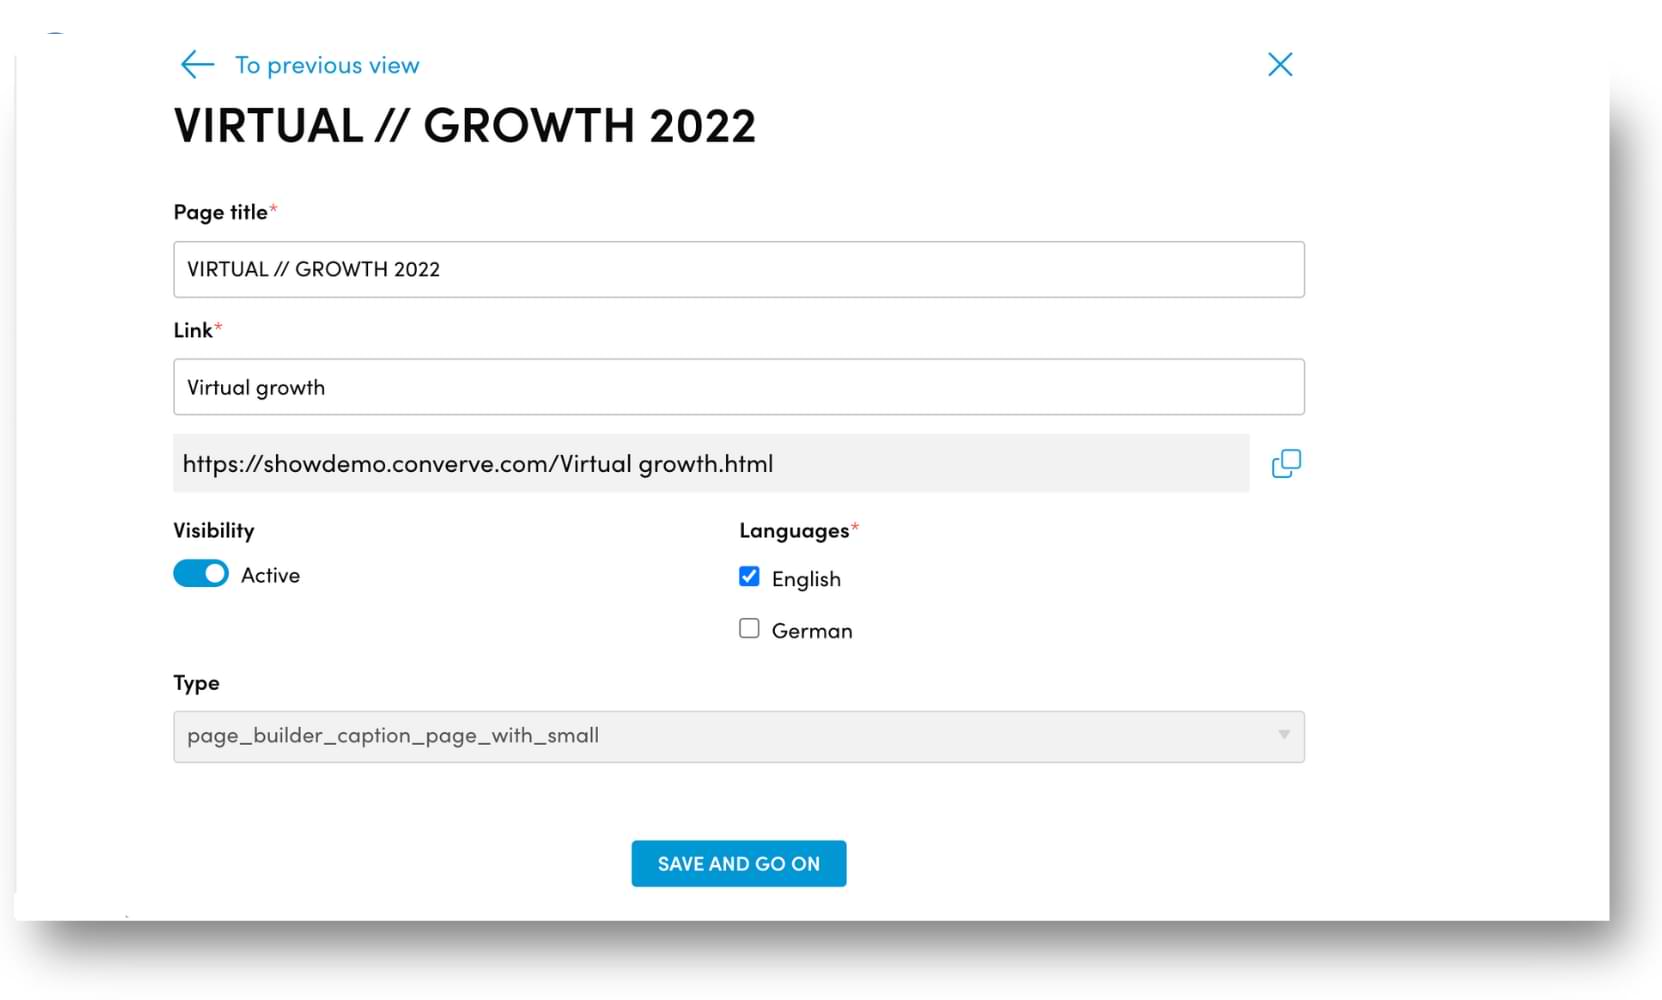
Step 6: Name your event page
Name your event page in the first field. The second field generates a URL. Enter a short description without spaces and this will create a sample link where you can track your progress live.
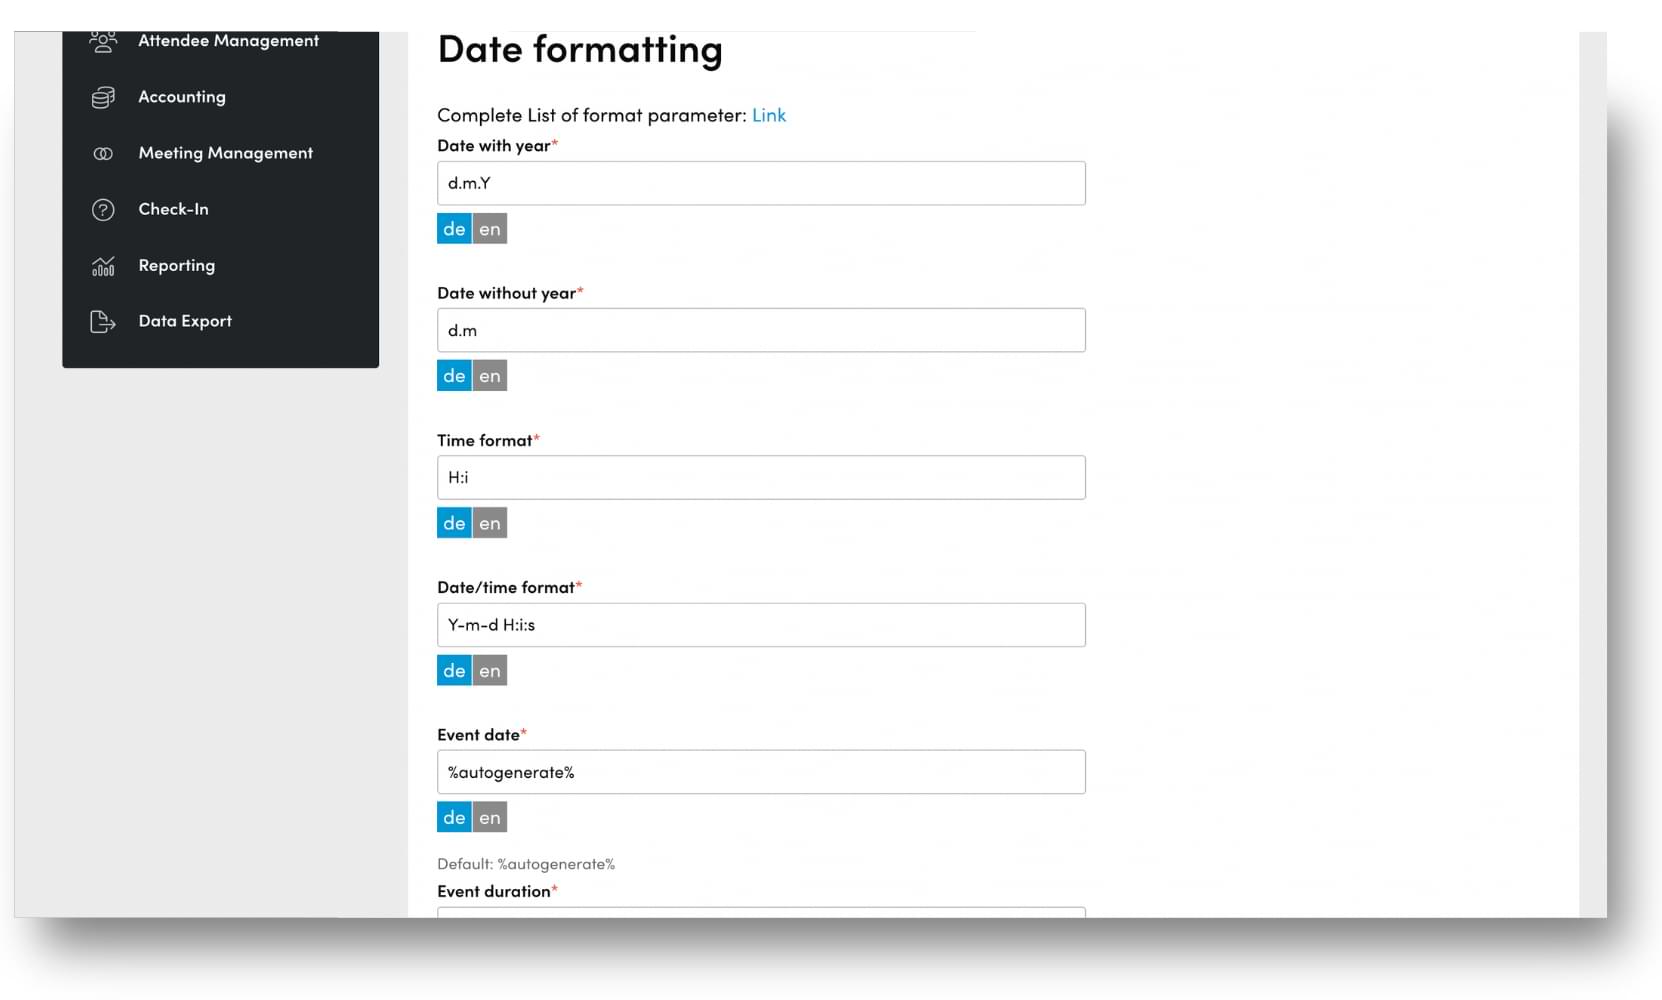
You also have language options to pick from.
Once you’ve selected your choices, click on “Save and go on”.
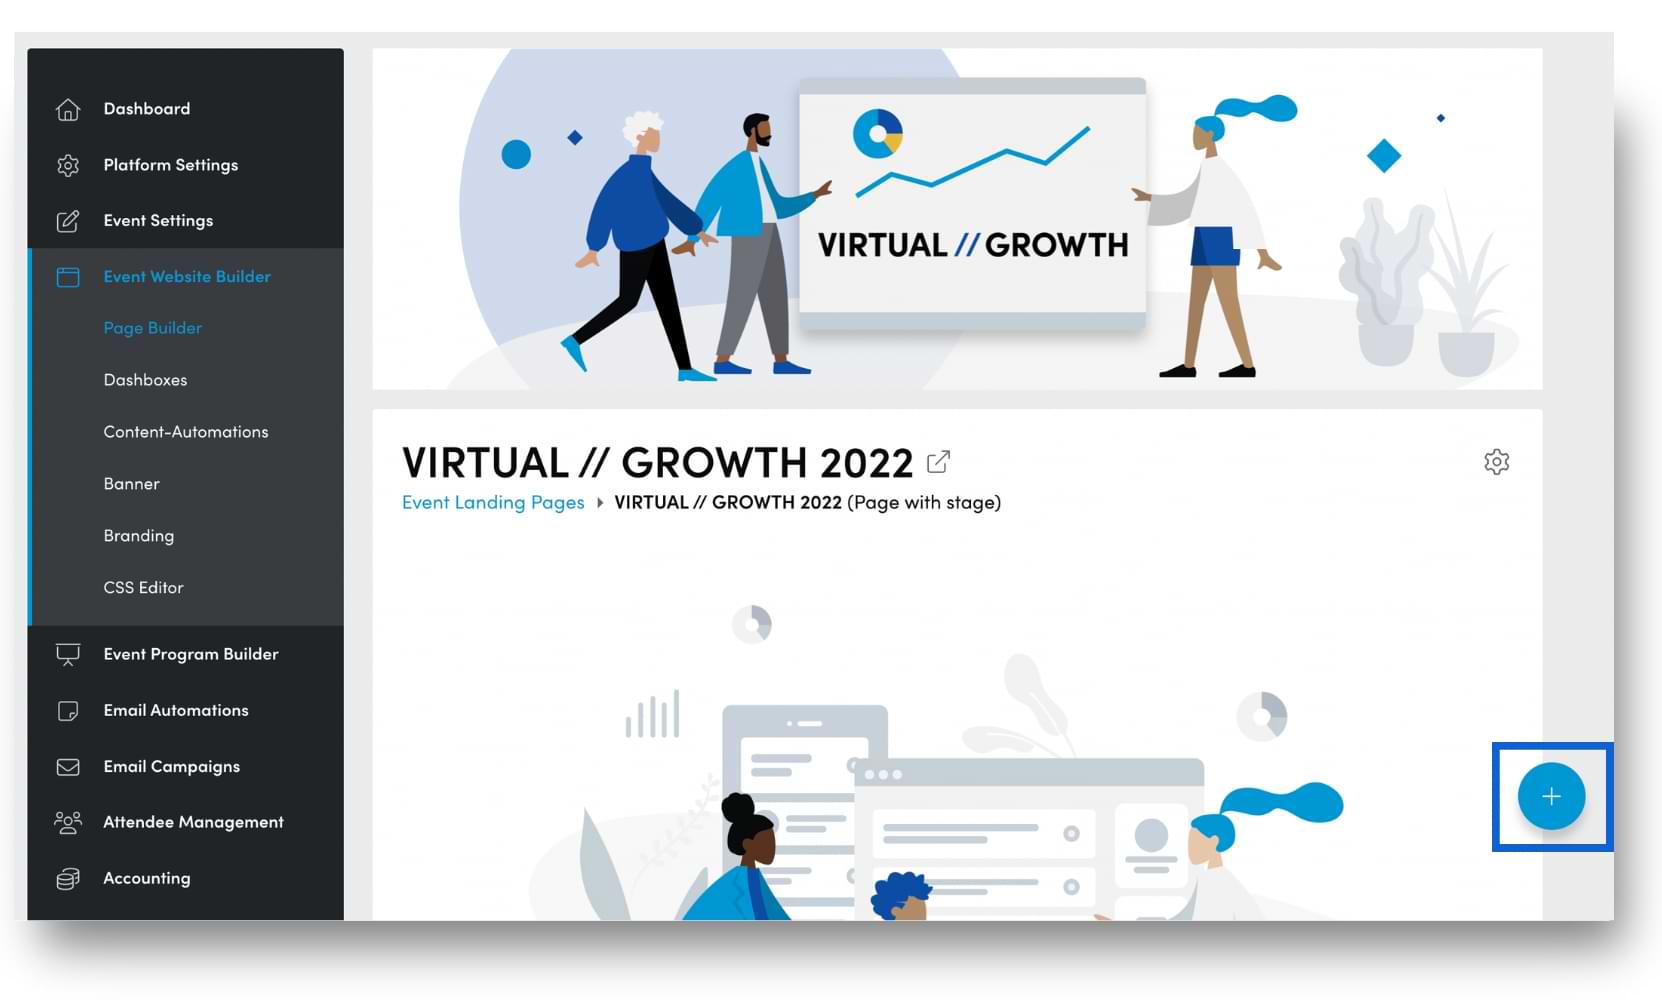
Step 7: Start building the event page
Once you’ve completed these steps, you get your Page Builder workspace to create your website.
Click on the “+” option on the bottom right corner of your screen to add website blocks.
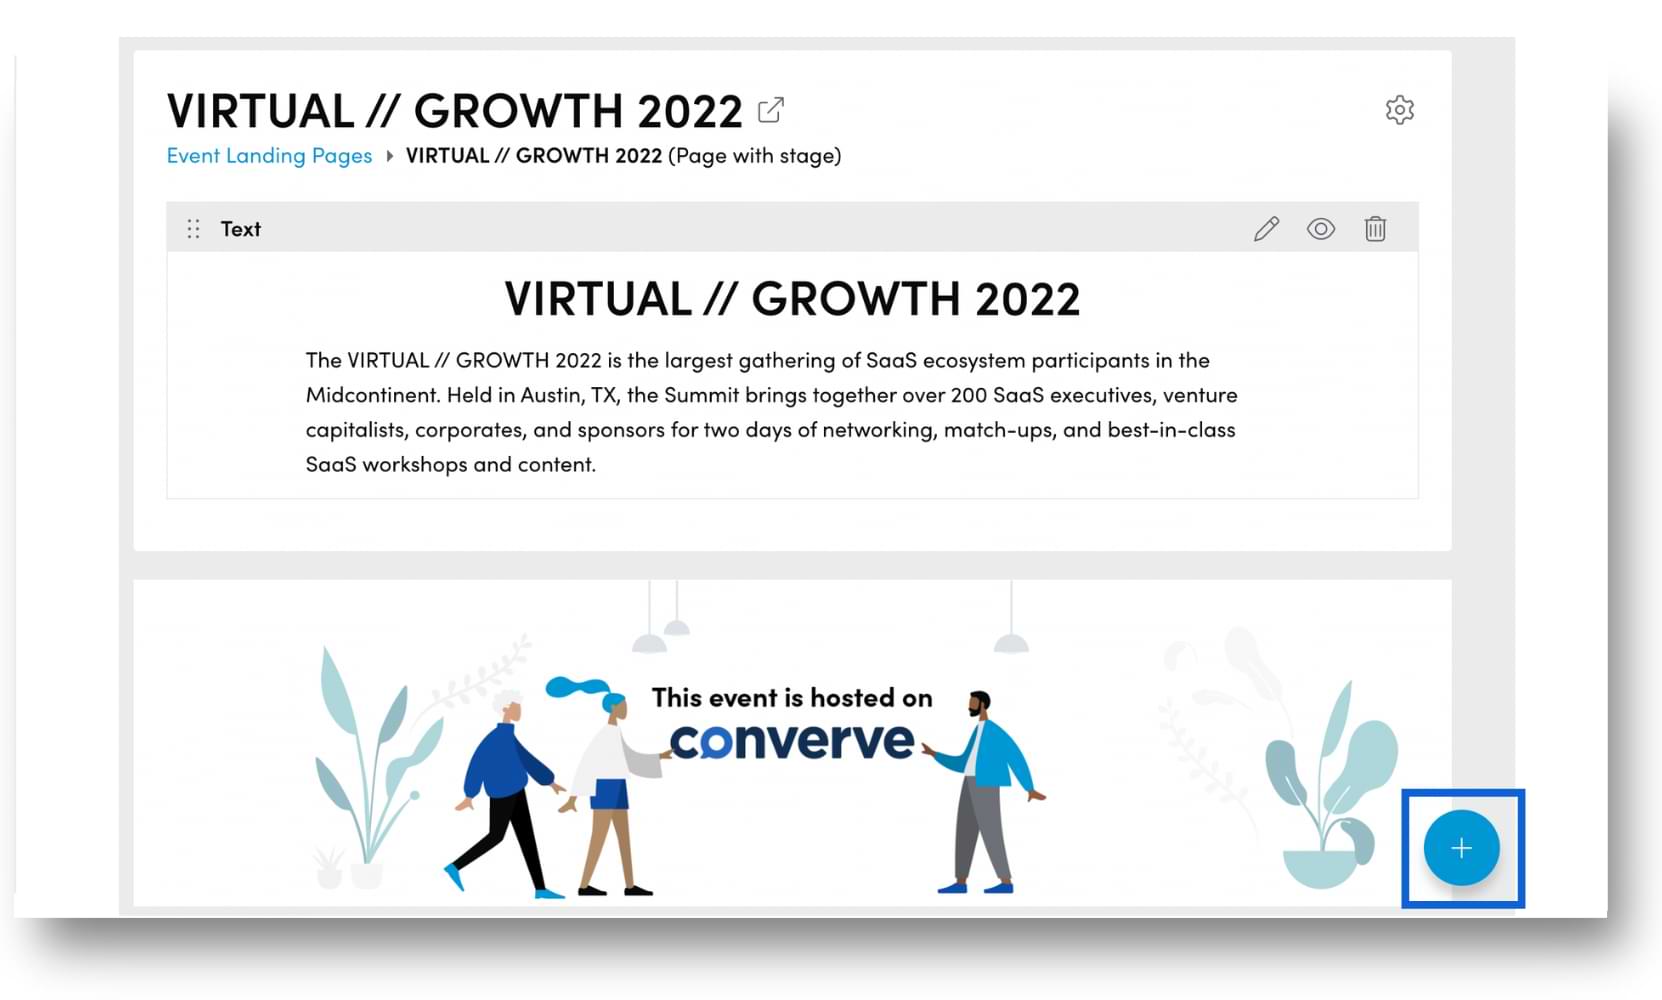
Step 8: Create the first content block of your event landing page
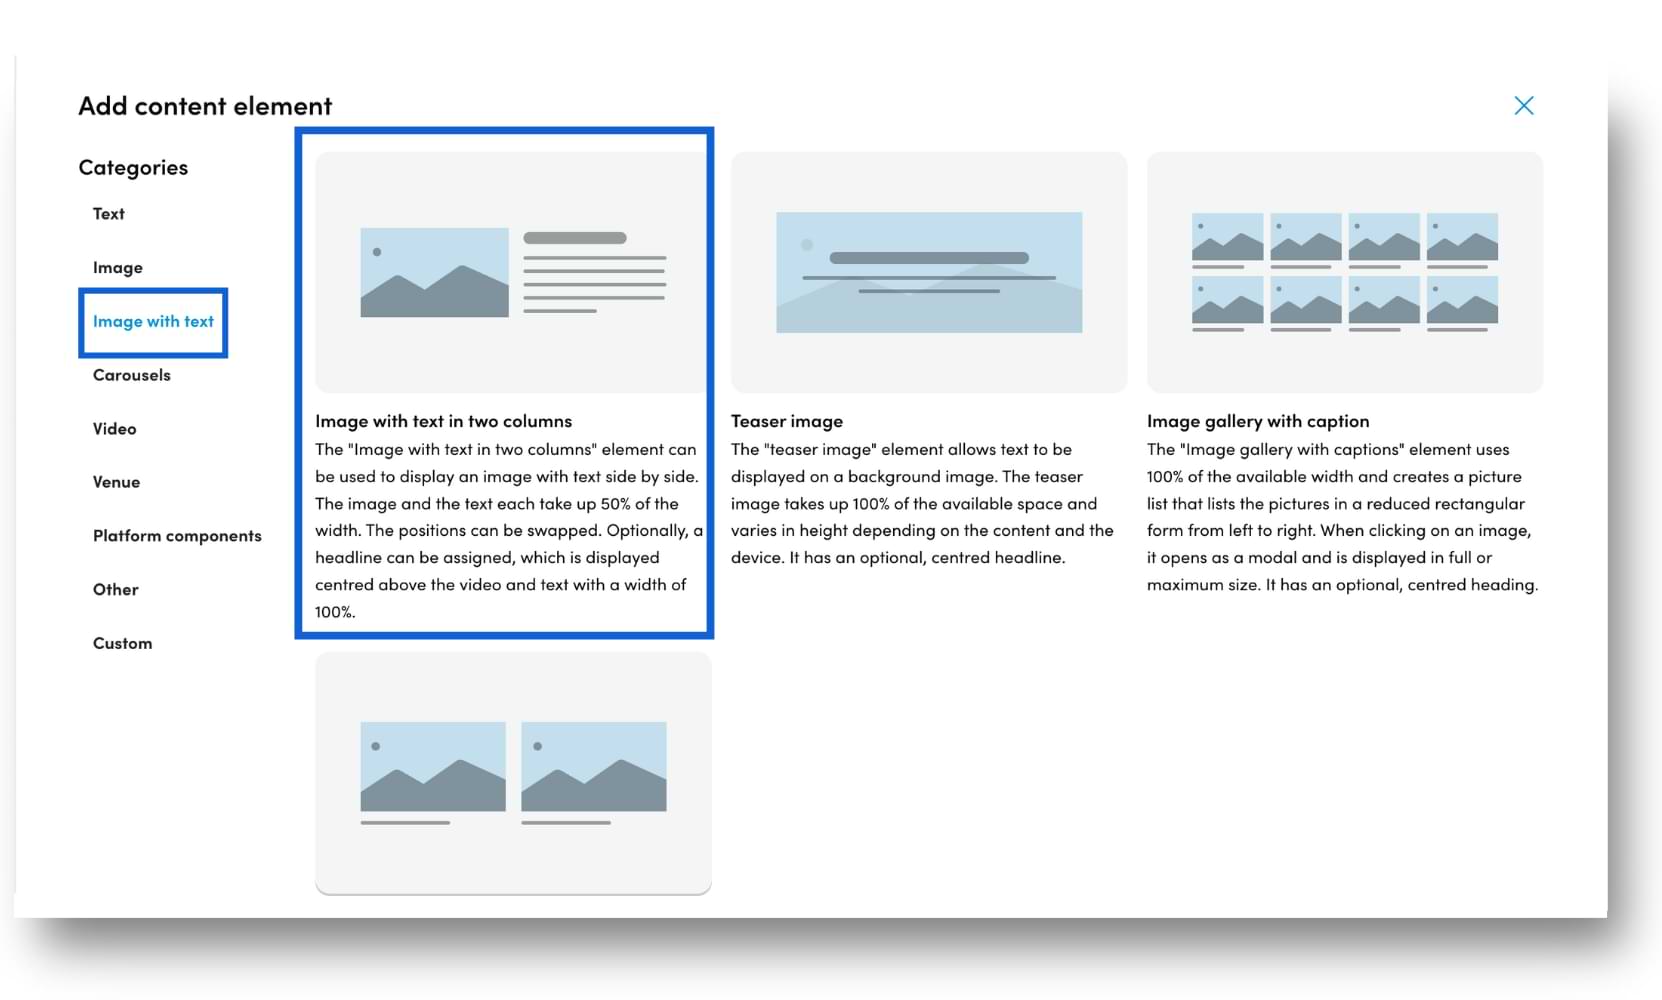
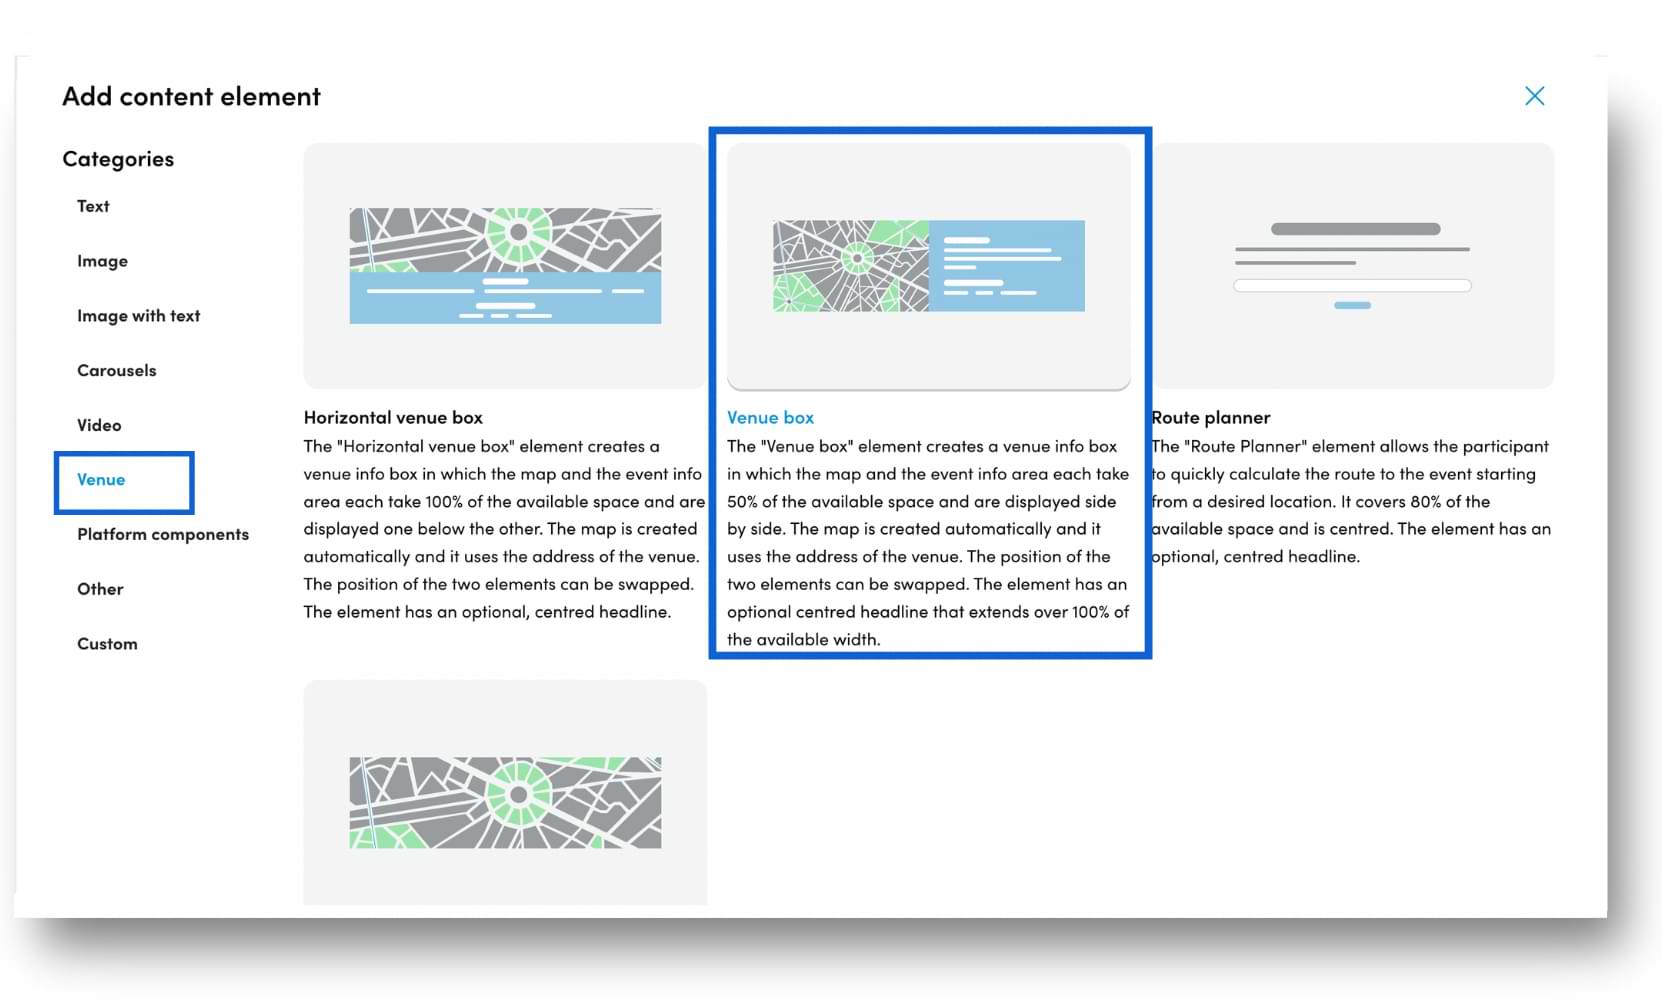
A pop-up menu with content categories appears when you click on the “+” button on the page builder workspace. There are different content formats you can experiment with.
We have chosen the “Text” option and the “Text” card for this example.

Type in the headline in the first field. This is typically the name of your event.
You can enter the description in the second box and format it to your liking.

Hit “Save Element” once you’re done and you’re taken back to the page builder workspace. Here you can see all the details you’ve entered for the first section of your website.
Step 9: Add the second content block
Add more details to your event landing page with other elements from the “+” option. The “Image with text” element has 4 card combinations of photos and written content.
We have chosen the “Image with text in two columns” for this example.
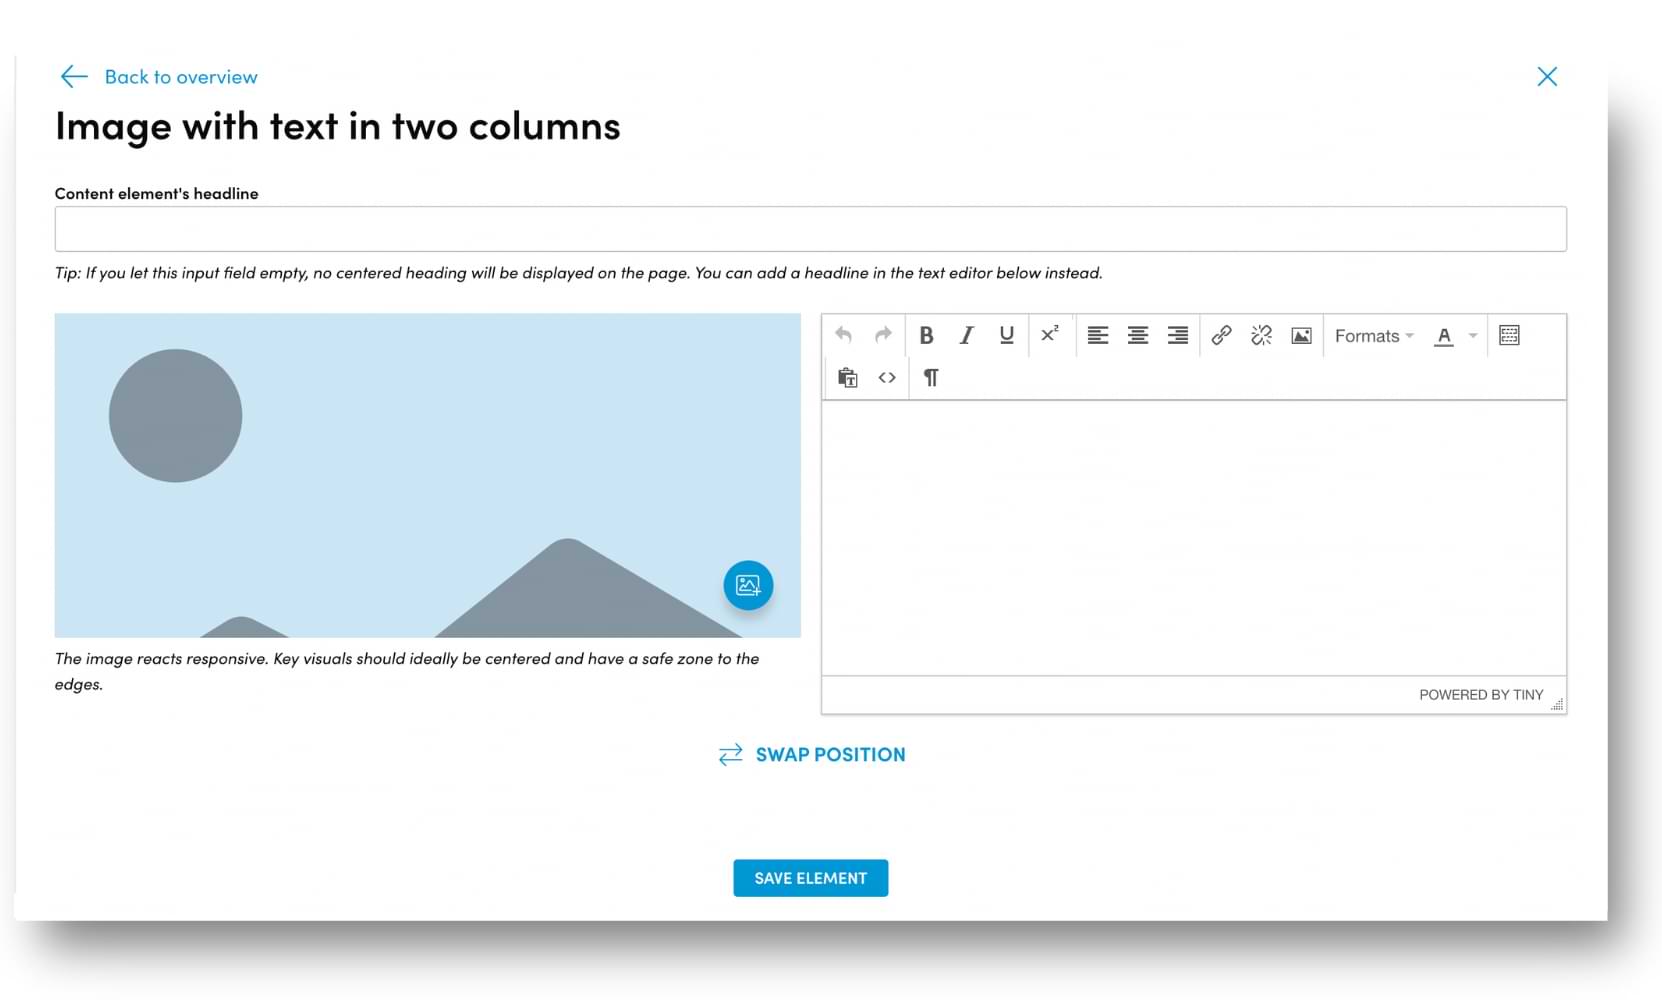
Here you have three fields where you can enter the title of the section, upload an image, and enter text and format it.
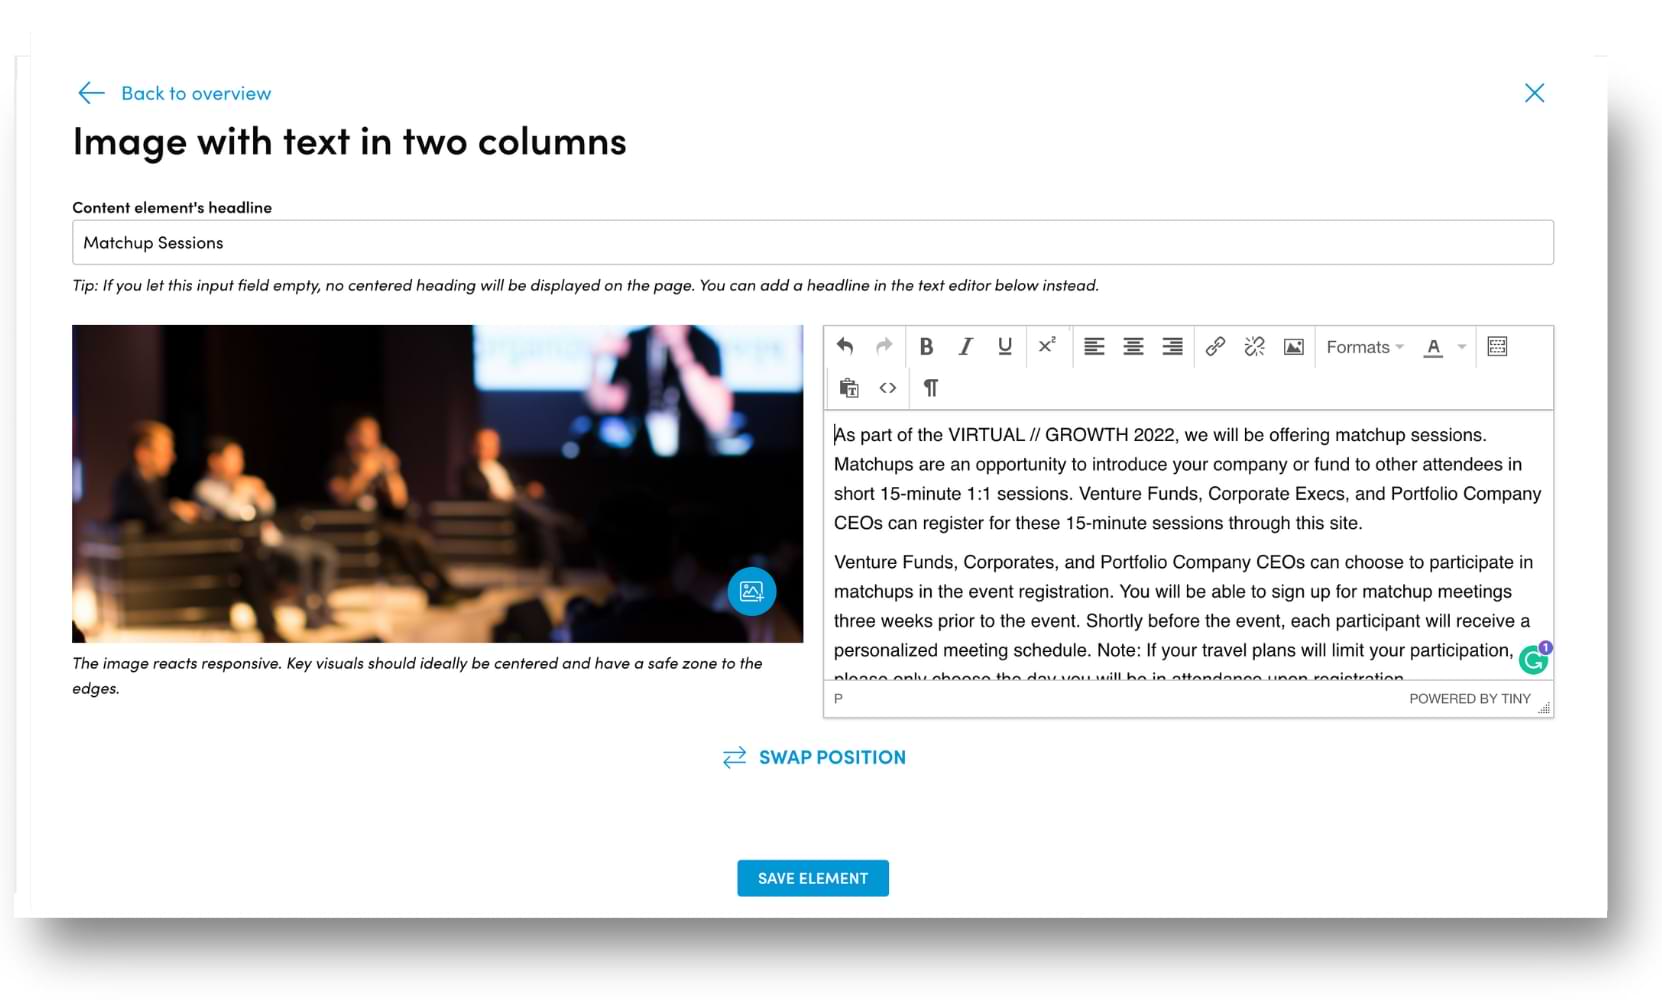
An example of what the fields would look like after entering the details.
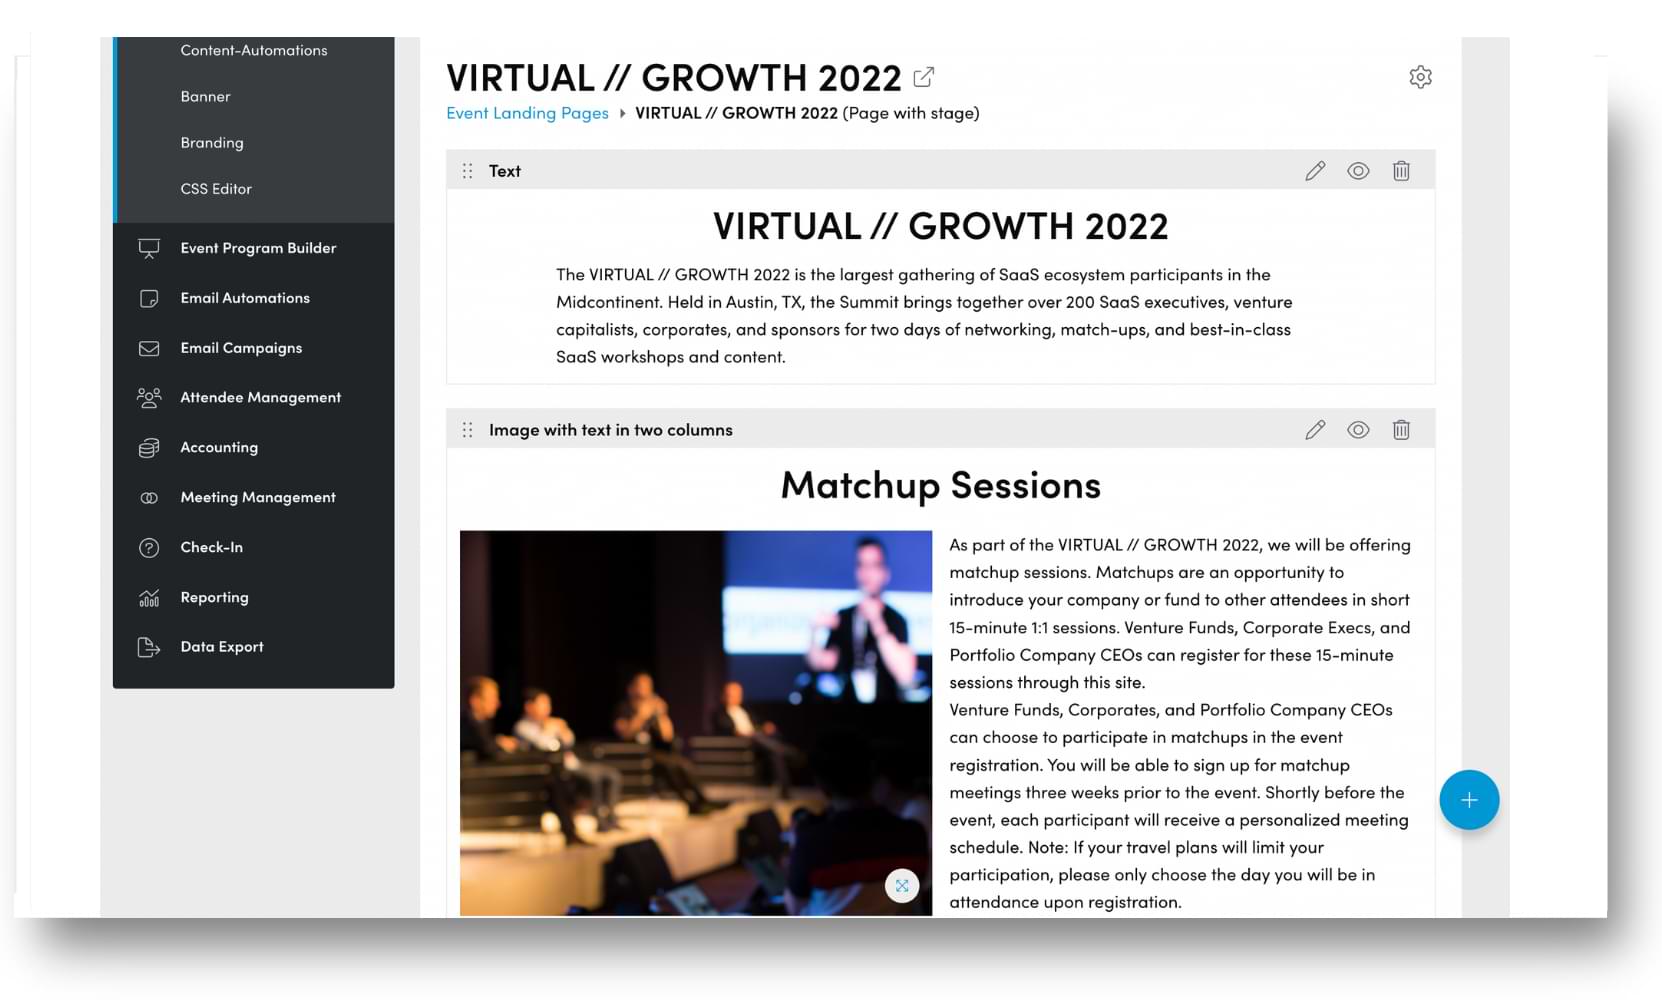
Once you hit “Save Element”, here’s what your page builder workspace would look like.
Step 10: Build your third content block
We’ve completed the page with the final content element which is the “Venue”. If you’re having a physical event or a hybrid event, it would be a good idea to include details of the location. You can add a map and contact details so your attendees can reach you easily.
We have chosen the option on the second card as an example.
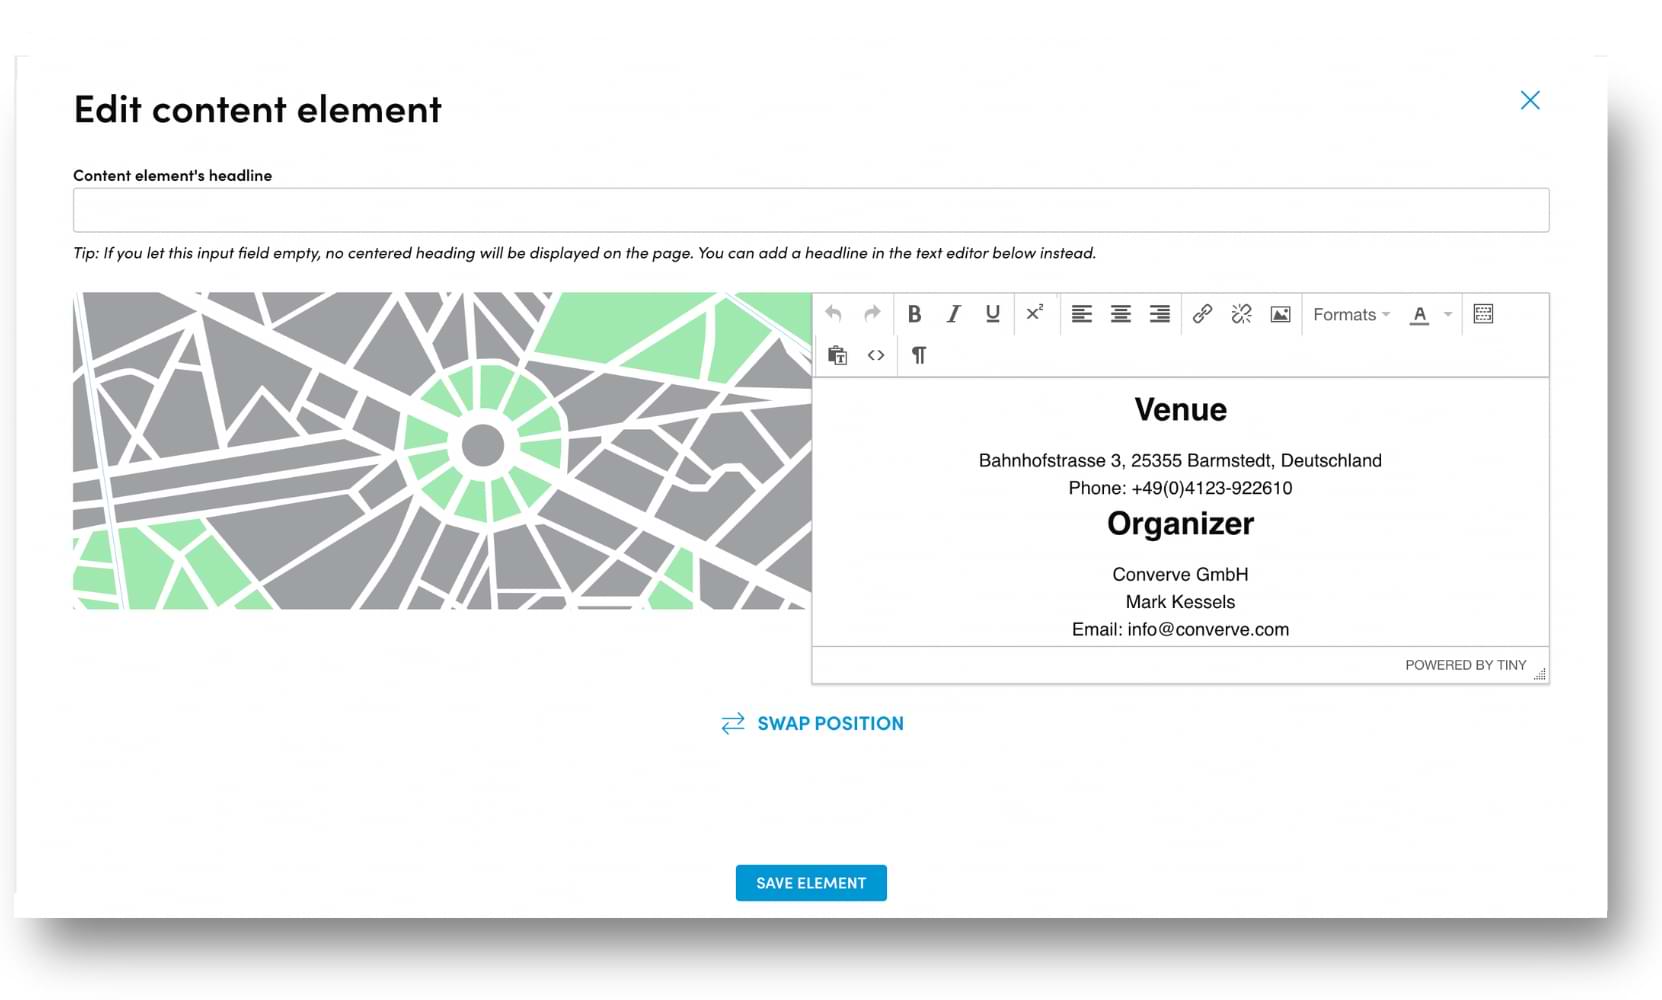
Add the title and contact details. Please note the map is generated from the event address entered in the “Edit event” option under the “Event settings” tab in the dashboard.

A snapshot of what the fields look like after entering the details.
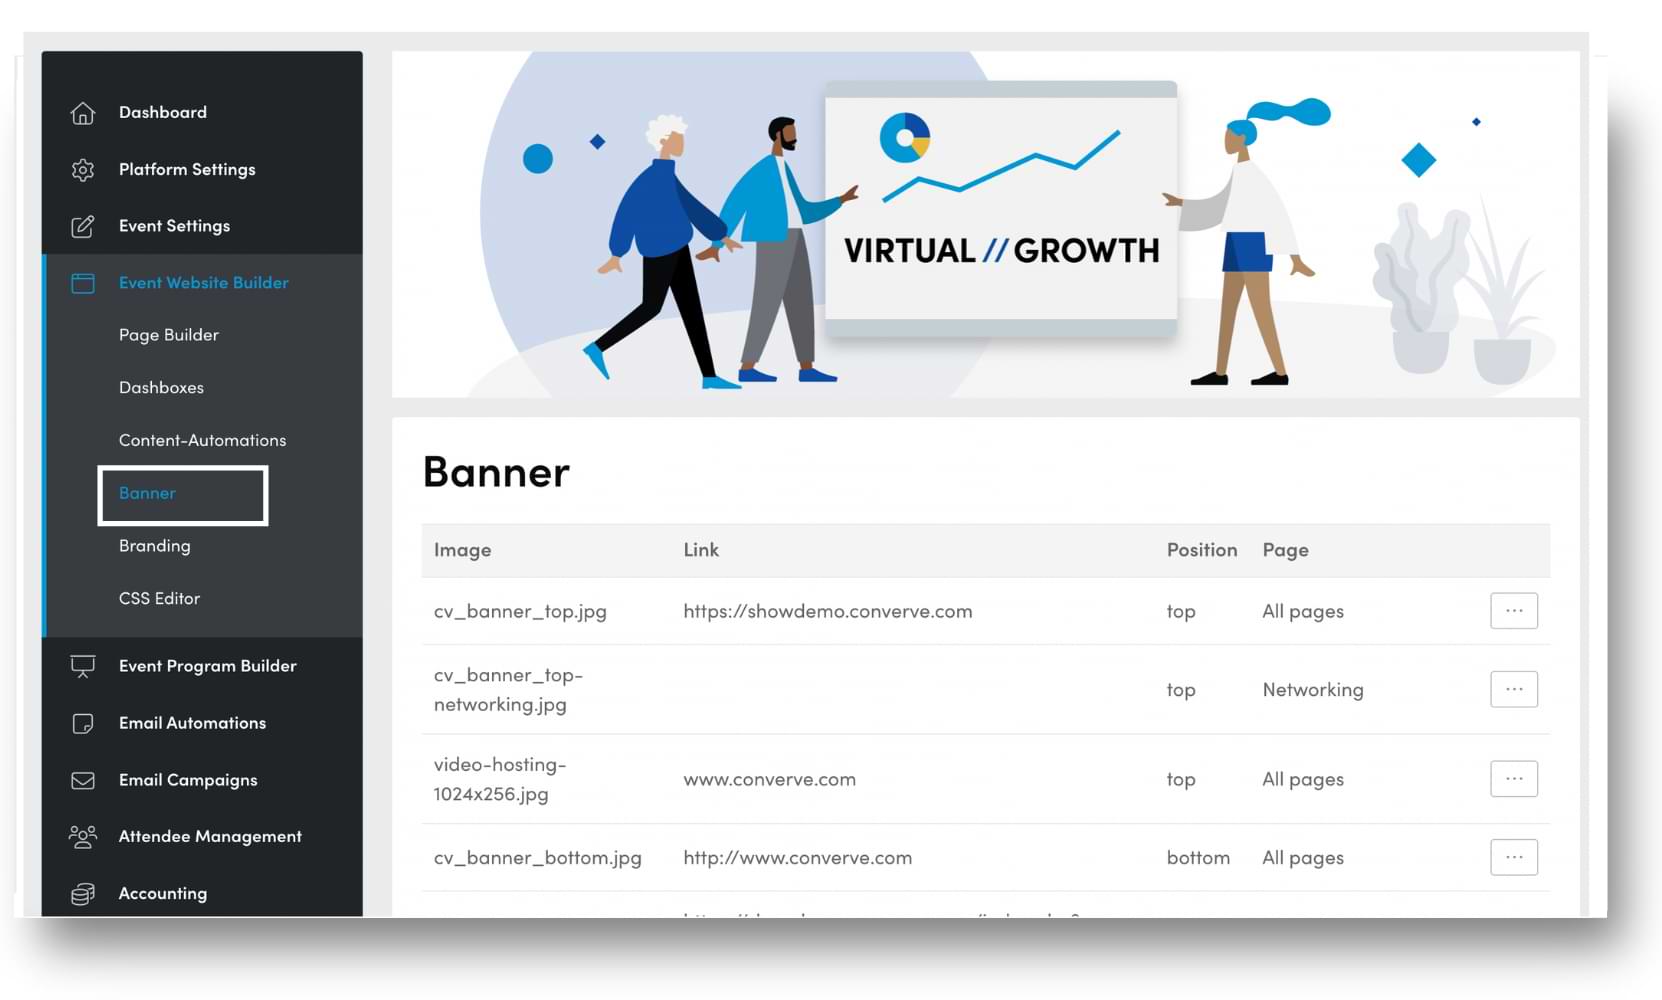
Under the “Event Website Builder” option in the dashboard, you can find the option “Banner” where you can upload custom images.
If you choose to go for the default banner images available on the platform, you can skip this step.
Step 12: Track your progress live
Find out what your event landing page looks like as you are building it. After adding or editing a content block, you can view it live and make desired changes.
The link to check-out your work-in-progress website can be found in the page builder workspace next to the title.
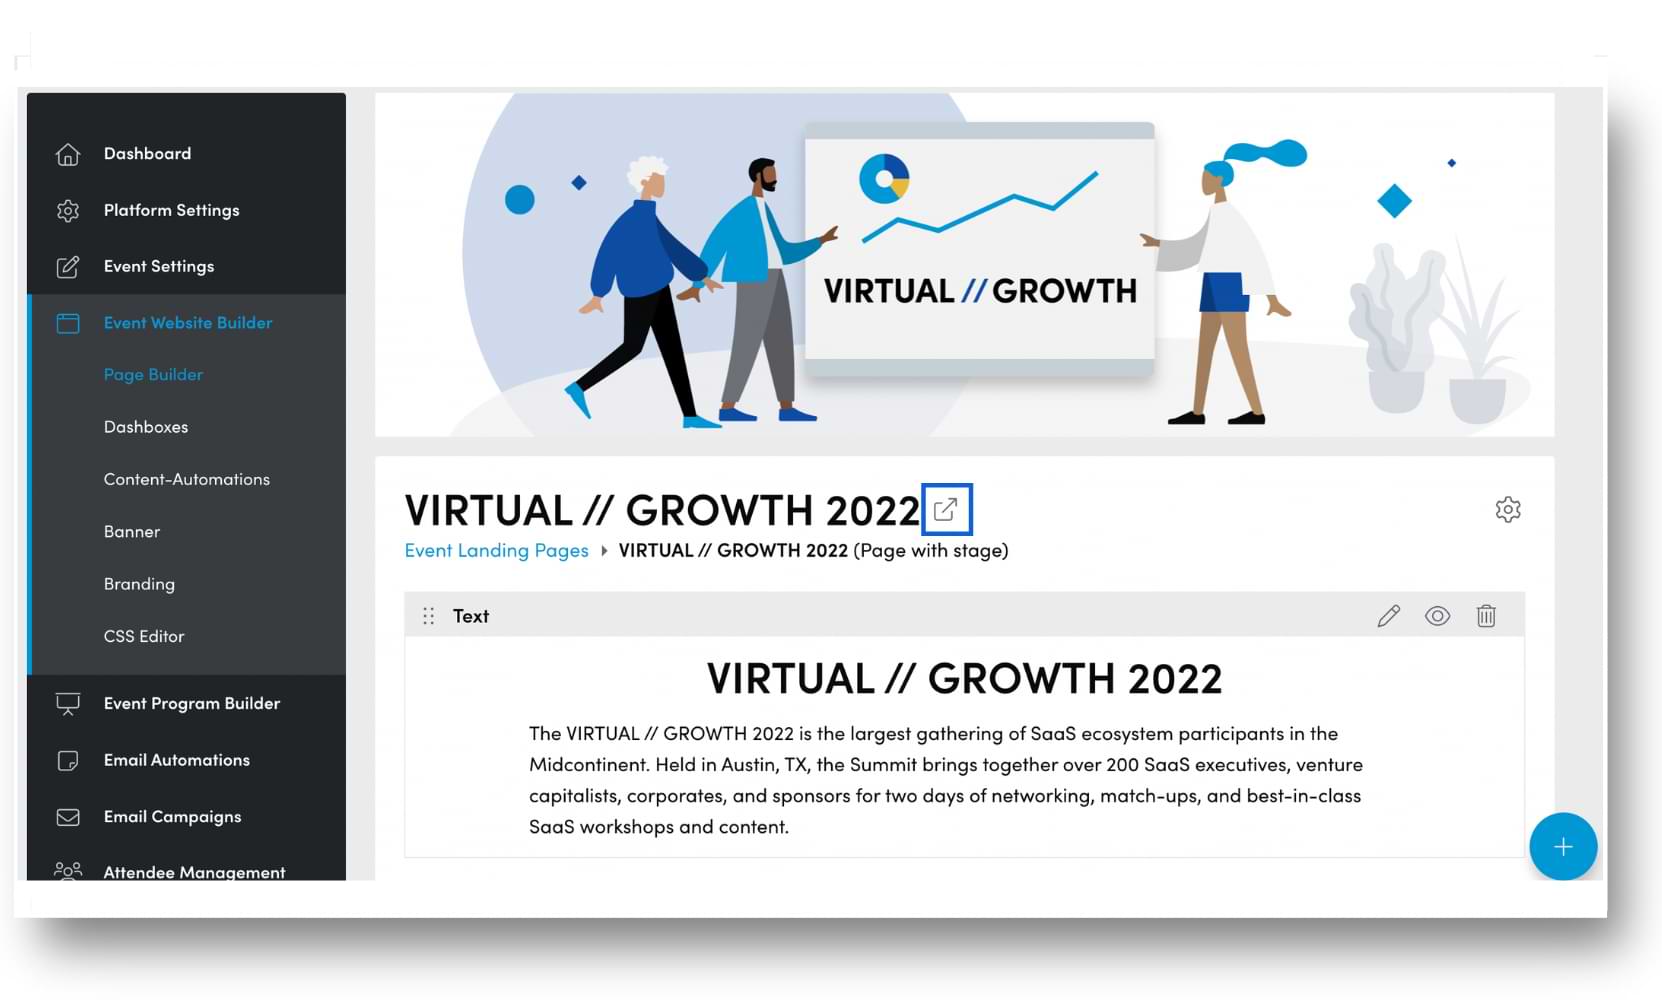
Here’s an example of what the website looks like after adding the first content block viewed with the live progress link.
So we’ve covered the details to build your Converve event page. Now let’s go through some best practices to increase sign-ups on your website.
6 tips to boost registrations with Converve’s Event Landing Page
- Give your event a memorable name. Your event name should be easy to remember and give an insight into what it’s about.
- Write a short summary of the event. Keep the copy sharp, clear, and to the point so visitors have all the information they need.
- Add relevant details. Information like date, time, location, and speakers are vital aspects to drive sign-ups.
- Feature stunning visuals. Colours, pictures and design elements can grab your audience’s attention and create a good impression about your event.
- Include a CTA to register for the event. Direct your visitors to take action by asking them to sign-up.
- Promote your event landing page. Make the most of your event page by sharing it on social media, email, Google Ads and word of mouth.
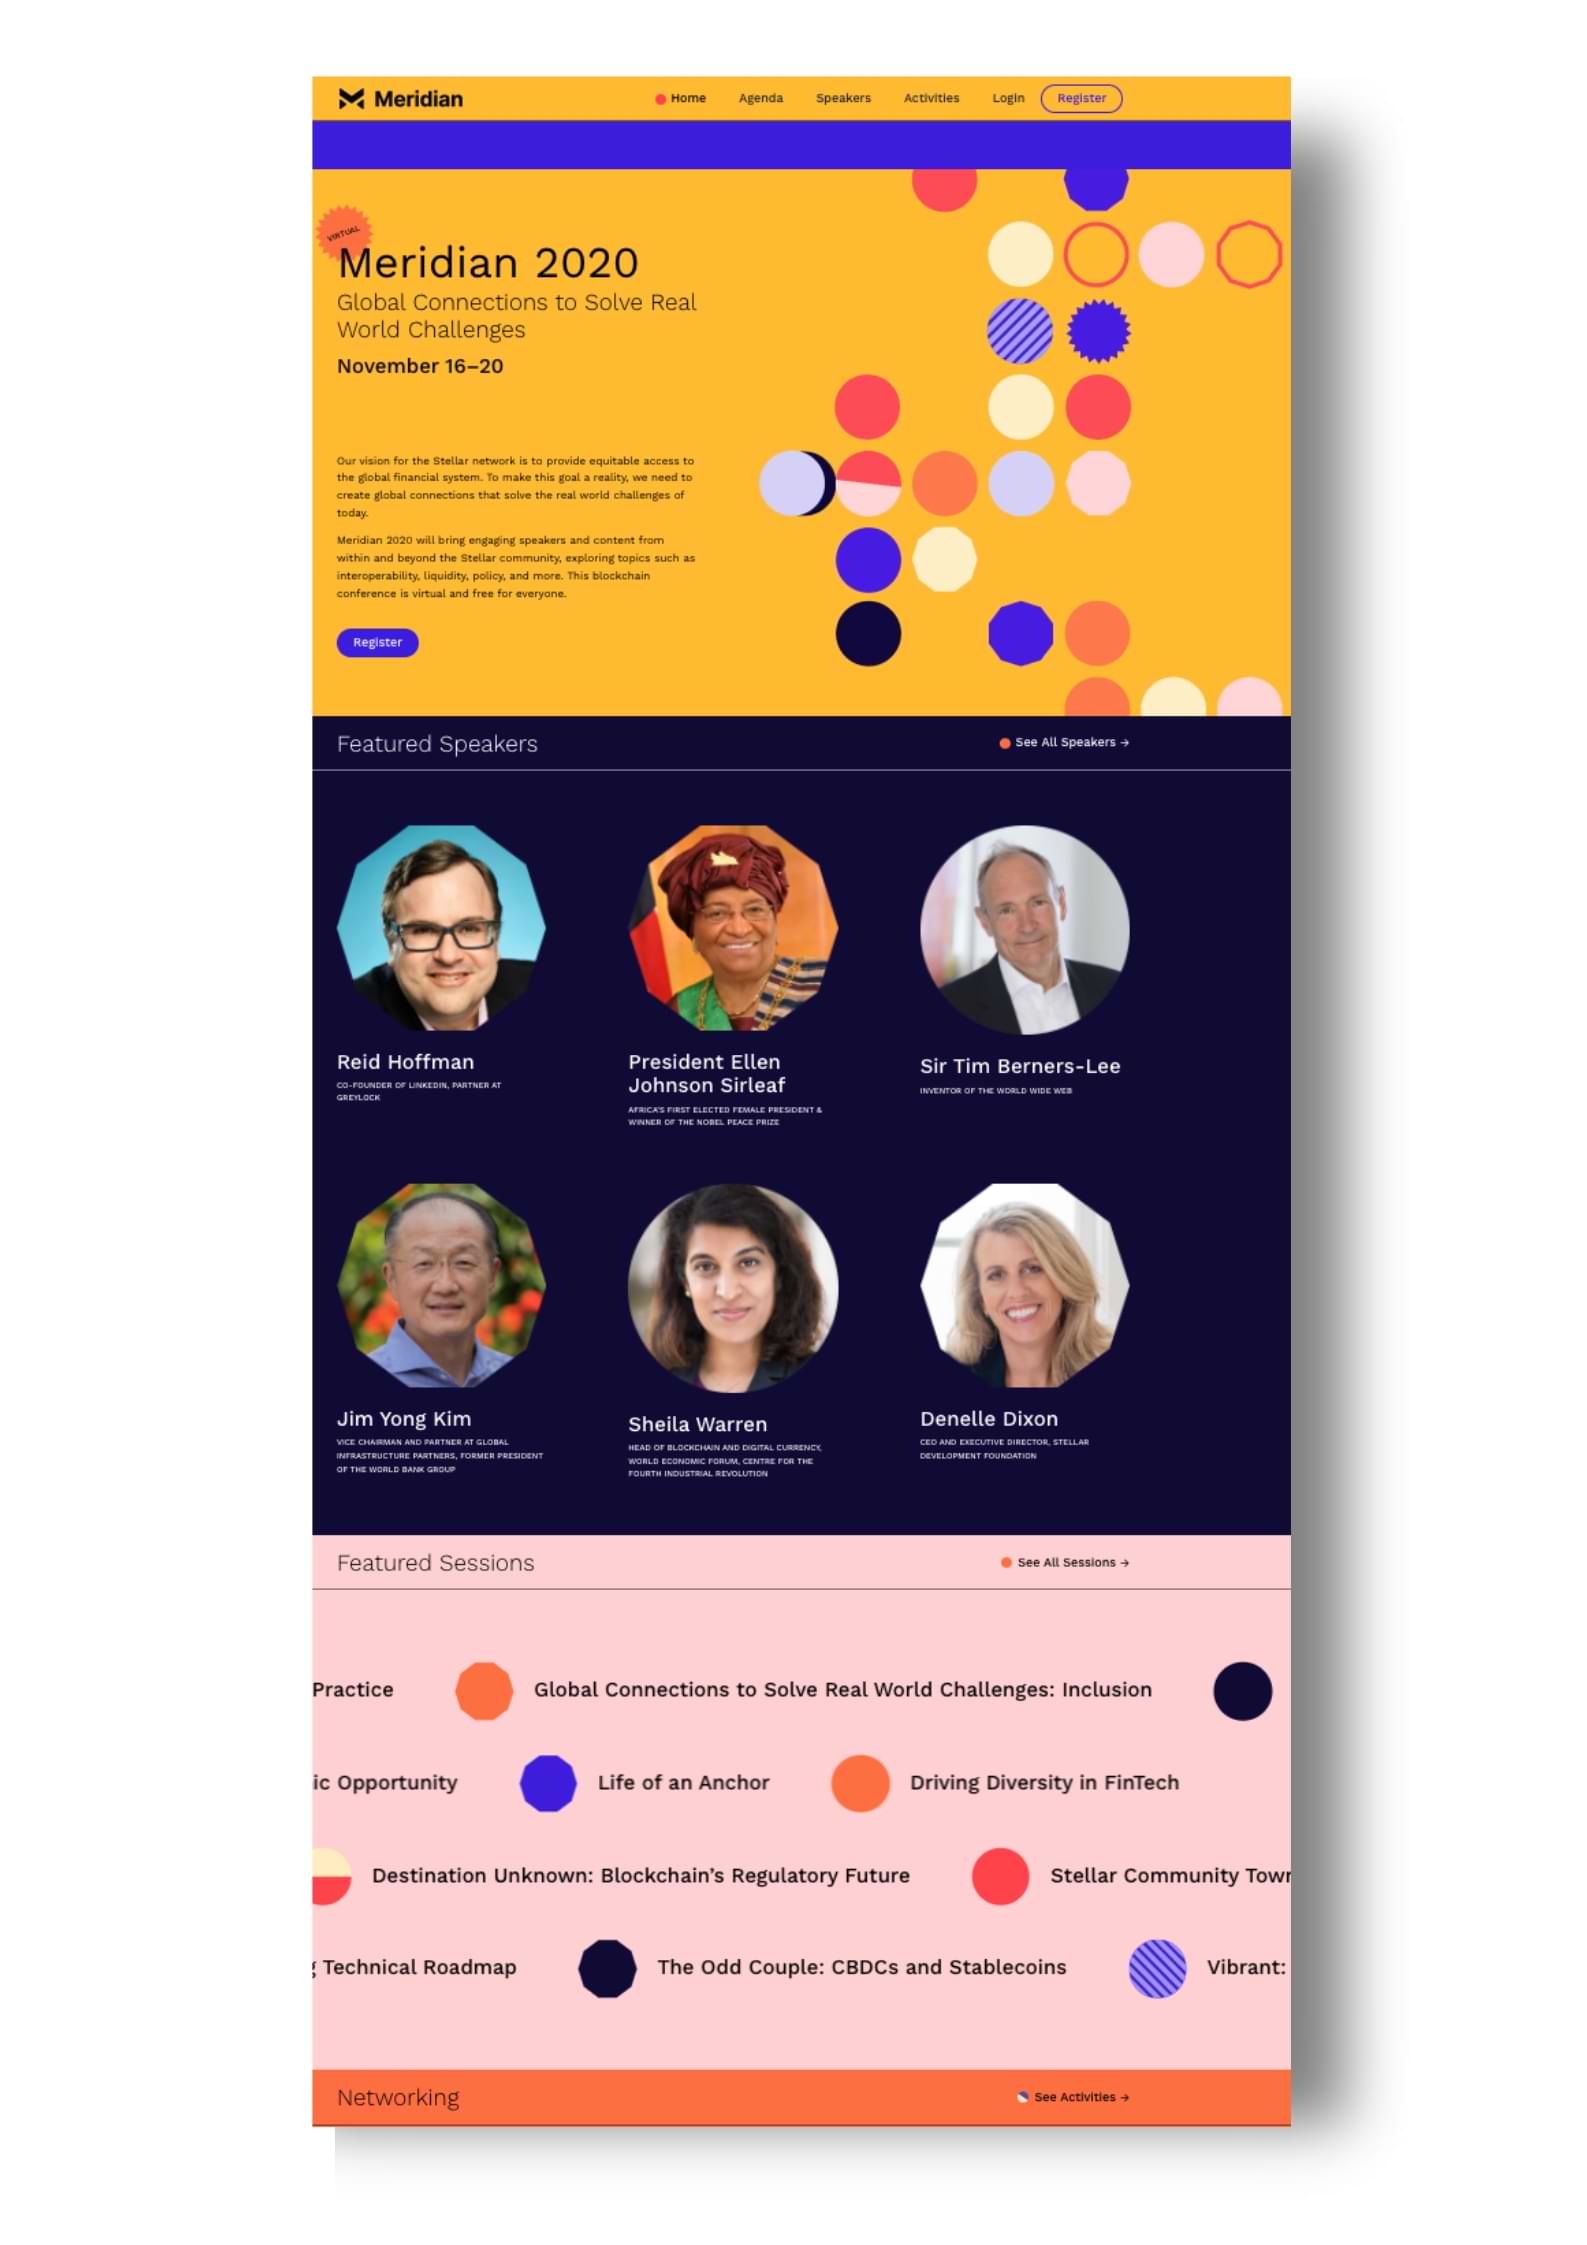
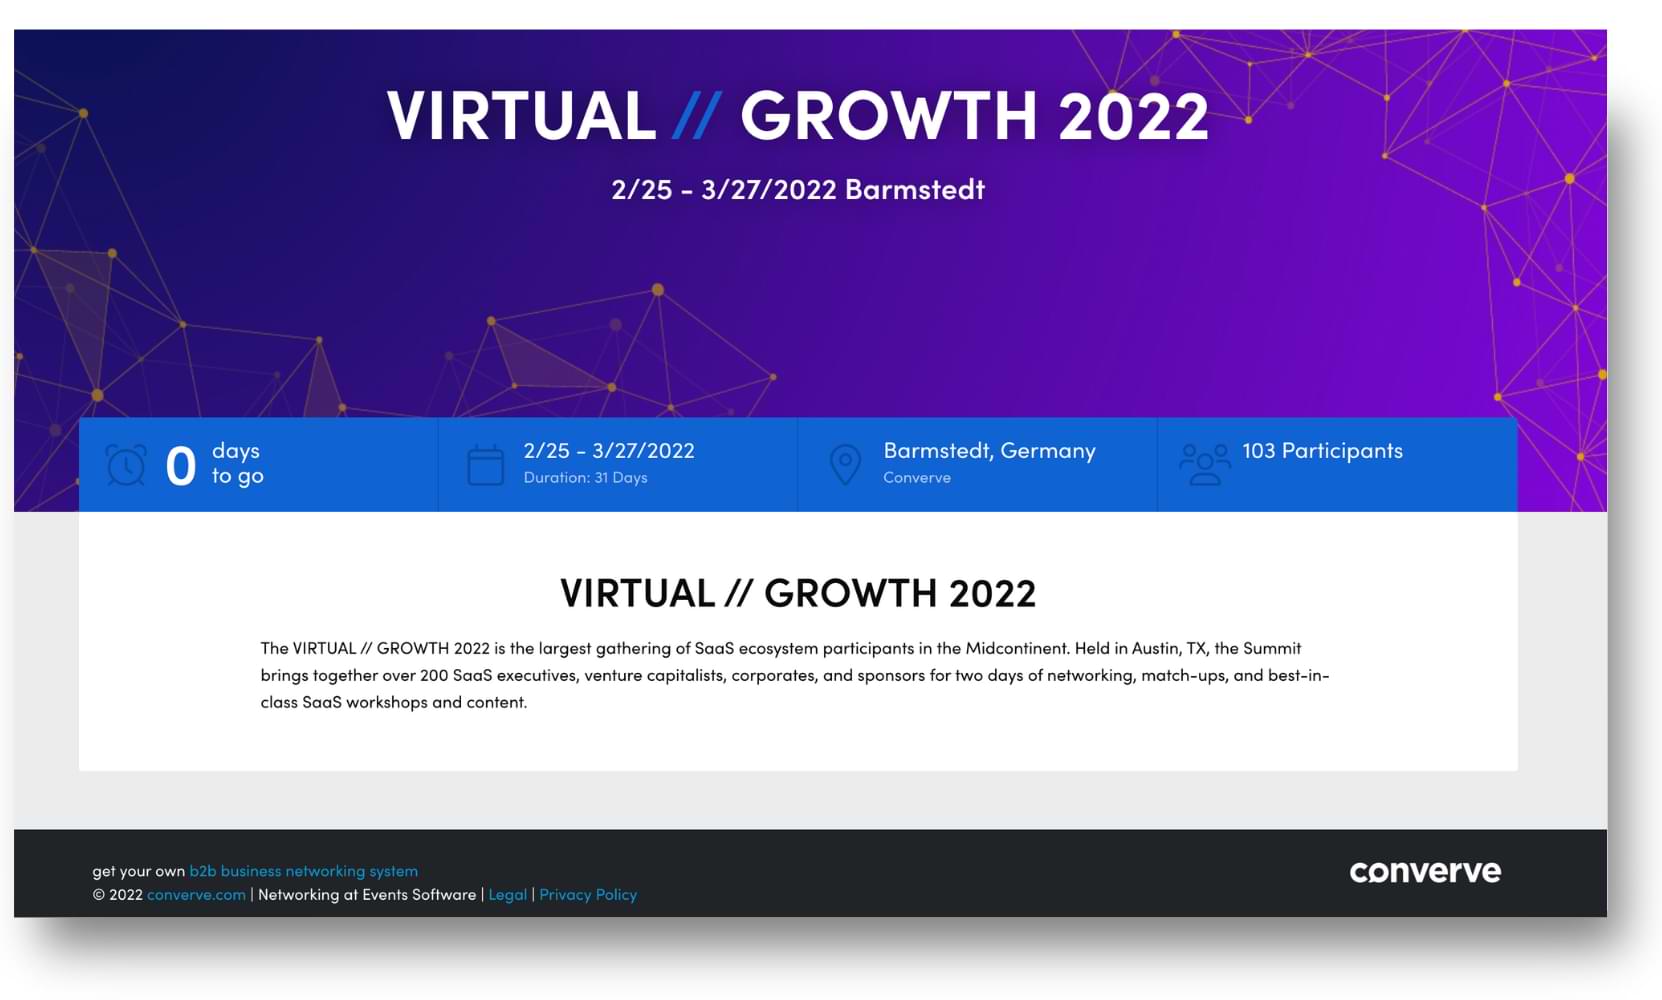
Event landing pages designed using Converve’s page builder
Here is a landing page example you can easily build yourself without any outside assistance.
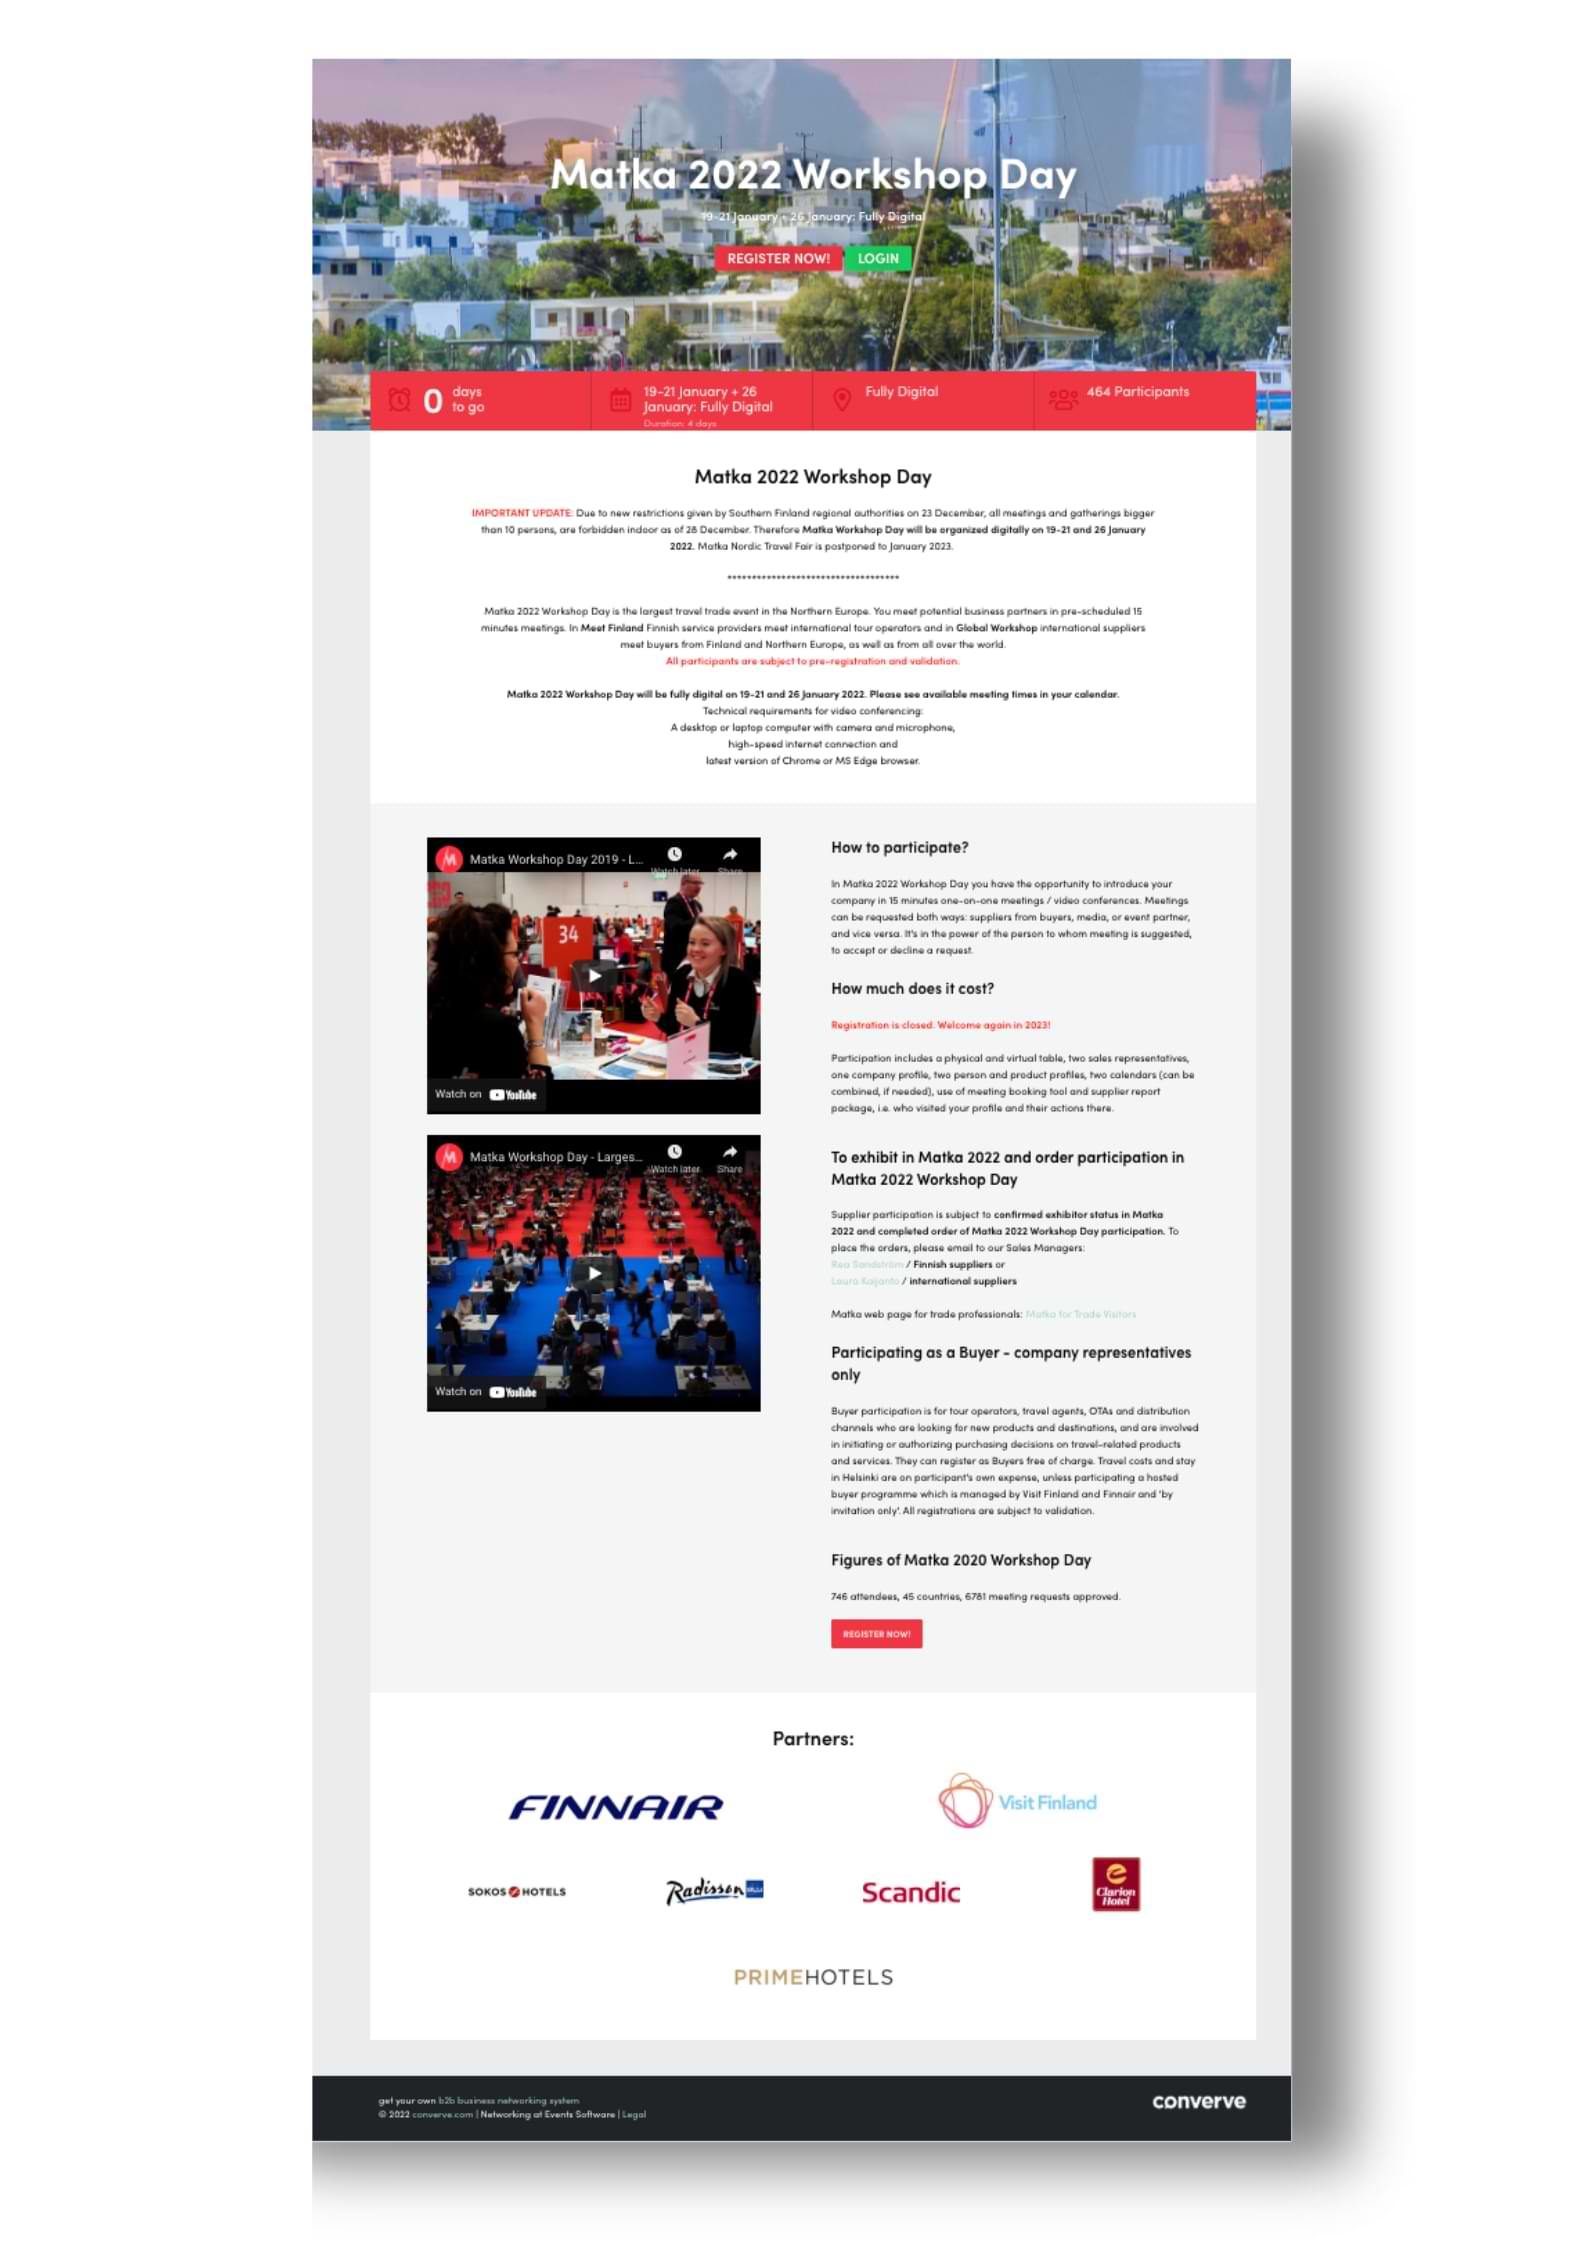
At Converve we offer full access to the CSS, so you can do additional customizations while still gaining all the benefits of your event platform. We are also happy to help you with that process. Here is an example how a custom event landing page could look like.